Discover the charm of crocheting a Highland Cow, a delightful project that combines creativity with the joy of crafting adorable animals. Perfect for all skill levels, this pattern offers a fun and rewarding experience, allowing you to create a unique and cuddly companion to treasure or gift.
1.1. What is a Highland Cow?
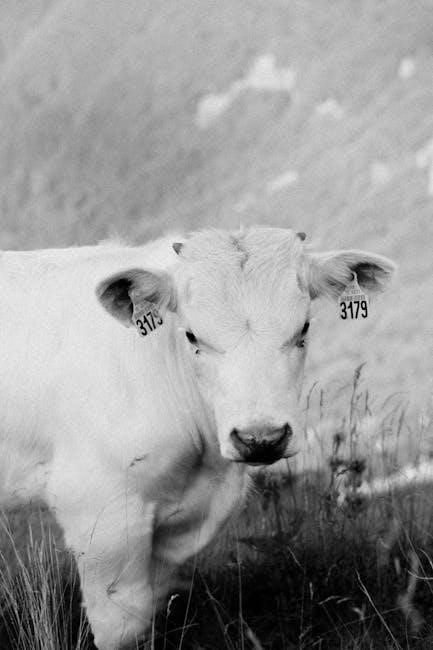
A Highland Cow, also known as a Scottish Highland, is a distinctive cattle breed originating from the Scottish Highlands. Known for its striking appearance, it features a thick, shaggy coat, long horns, and a robust build. These cows are admired for their hardiness, gentle nature, and unique charm. Their iconic look has made them a popular subject in art, crafts, and now, crochet patterns. The Highland Cow’s rugged beauty and friendly demeanor make it a beloved choice for crafters looking to create a cozy, lifelike companion. Its distinctive features, such as the fuzzy coat and curved horns, add character to any crochet project.
1.2. The Popularity of Crochet Animal Patterns
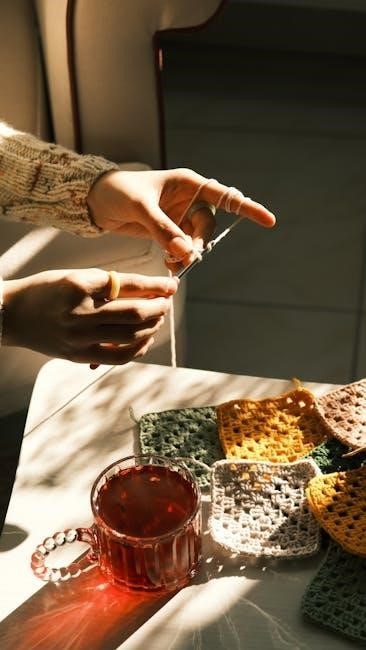
Crochet animal patterns have gained immense popularity worldwide, offering a creative outlet for crafters to bring adorable creatures to life. The rise of DIY culture and the joy of handmade gifts have fueled this trend. Animal patterns, like the Highland Cow, appeal to both beginners and experienced crocheters, as they combine simplicity with charm. The ability to customize colors and sizes makes each project unique. Additionally, the therapeutic benefits of crocheting, such as stress relief, have drawn many to this hobby. With the availability of free patterns, including the Highland Cow crochet PDF, crafting a cuddly animal has never been more accessible or enjoyable for everyone.
1.3. Why Choose a Highland Cow Crochet Pattern?
The Highland Cow crochet pattern is a unique and charming choice for crafters of all levels. Its distinctive shaggy coat and adorable features make it a standout project that’s both fun and rewarding to create. Whether you’re looking to challenge your skills or craft a heartfelt gift, this pattern offers a delightful way to bring a piece of Scottish countryside charm into your home. The process of crocheting a Highland Cow allows you to express your creativity while enjoying the satisfaction of watching your stitches come to life in a cuddly, lifelike form.

Materials and Tools Needed
Gather essential supplies like soft yarn, a suitable crochet hook, polyester fiberfill for stuffing, scissors, and a tapestry needle. These basics ensure a smooth crocheting process.
2.1. Yarn Selection for Highland Cow Crochet
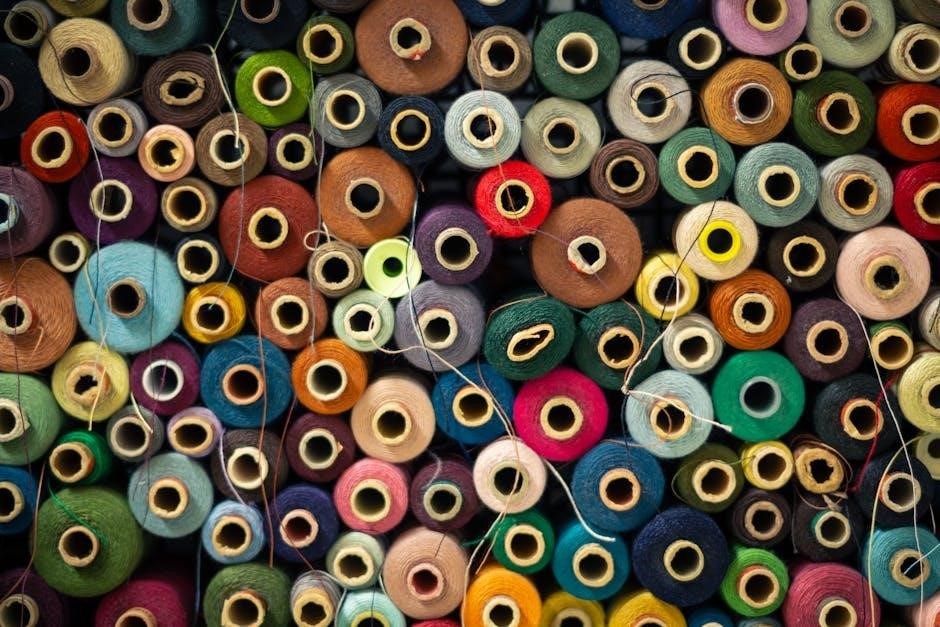
Choosing the right yarn is crucial for your Highland Cow crochet project. Opt for a medium-weight yarn with good stitch definition to capture the cow’s distinctive shaggy texture. Acrylic or acrylic-blend yarns are ideal due to their softness, durability, and ease of care. Earthy tones like browns, tans, and creams will help create a realistic appearance. Consider using a variegated yarn for a subtle, multi-tonal effect. Ensure you have enough yarn to complete the project, as color consistency is important. Swatching beforehand will help confirm the correct gauge and texture. Avoid overly bulky yarns to maintain the cow’s proportionate size and detail.
2.2. Crochet Hook Size and Type
Selecting the right crochet hook size is crucial for achieving the desired texture and size of your Highland Cow. Most patterns recommend a specific hook size, often between 4-6mm, depending on the yarn weight. Aluminum or steel hooks are ideal for precision, while wooden or bamboo hooks offer a comfortable grip for extended projects; Ensure your hook is compatible with your yarn to maintain consistent tension. Using the wrong size can result in a loose or stiff fabric, affecting the overall appearance of your cow. Always double-check your pattern for the recommended hook size to ensure the best results.
2.3. Stuffing Material for the Cow
The stuffing material is crucial for giving your Highland Cow its soft, cuddly shape. Polyester fiberfill is the most recommended option due to its durability and ability to hold its form. It provides the right balance of firmness and fluffiness, ensuring your cow stands upright and maintains its structure. When stuffing, use a generous amount but avoid overstuffing, as it can make the cow feel rigid. For a more eco-friendly option, you can use cotton batting, though it may not provide the same loft. Always ensure the stuffing is evenly distributed to achieve a natural, lifelike appearance.
2.4. Other Essential Tools
Besides yarn and hooks, you’ll need a few more tools to complete your Highland Cow crochet project. Scissors are essential for cutting yarn, and a tapestry needle will help weave in ends neatly. Stitch markers are handy for marking specific stitches or rounds, ensuring accuracy. A measuring tape or ruler will help you check your work’s size as you go. Additionally, a stuffing tool or a chopstick can assist in firmly packing the stuffing material into tight spaces. Optional tools include a yarn needle for sewing seams and a small brush for fluffing up the finished cow’s fur. Having these tools ready will make your crocheting process smoother and more enjoyable.
Understanding the Highland Cow Crochet Pattern
Mastering the Highland Cow Crochet Pattern involves grasping its structure, stitches, and sequence. This comprehensive guide ensures a smooth journey from start to finish with clear instructions.
3.1. Reading Crochet Patterns for Beginners
Reading crochet patterns can seem daunting at first, but with practice, it becomes second nature. Start by familiarizing yourself with basic abbreviations like ch (chain), sc (single crochet), and st (stitch). Patterns often include symbols or diagrams to guide you, so take time to review them carefully. Pay attention to the gauge, which ensures your stitches are the correct size. Begin with simple patterns and gradually move to more complex ones. Highlight or underline terms you’re unsure of and look them up in a crochet glossary. Practice with scrap yarn to test stitches before starting your Highland Cow project. Understanding the basics will help you follow the pattern confidently and make necessary adjustments as you go.
3.2. Understanding Abbreviations and Symbols
Mastering crochet abbreviations and symbols is crucial for successfully following patterns, including the Highland Cow crochet design. Common abbreviations like ch (chain), sc (single crochet), and st (stitch) are frequently used. Symbols, often represented as diagrams or icons, denote specific stitches or techniques. These visual cues help clarify complex steps, ensuring accuracy. Always refer to the pattern’s key or glossary for definitions. Understanding these elements will enhance your crocheting experience, allowing you to create a lifelike Highland Cow with precision and confidence. Practice recognizing these shorthand terms and symbols to improve your skills and ensure your project turns out as intended.
3.3. Importance of Tension in Crochet
Maintaining consistent tension is crucial for achieving the desired shape and appearance of your Highland Cow crochet project. Even stitches ensure the fabric lies flat and the cow’s features are well-defined. If your tension is too tight, the body may become rigid, while loose stitches can make it saggy. To master tension, practice with a swatch and ensure you’re using the correct hook size for your yarn. Pay attention to how tightly or loosely you hold the yarn while crocheting. Adjusting your tension early on will save time and ensure your Highland Cow turns out soft, cuddly, and realistically proportioned. Consistency is key to a professional finish.
Step-by-Step Crochet Guide
Begin with the body, creating a sturdy base before moving to the head, ears, and details. Progress to horns, eyes, and limbs, finishing with the tail for a complete Highland Cow.
4.1. Starting with the Body
Begin by creating the body of your Highland Cow, which serves as the foundation for the entire project. Start with a magic ring or a small chain, then work a series of single crochet stitches to form a circle. Gradually increase the number of stitches in each round to shape the body into a rounded form. Use stitch markers to keep track of your starting point and ensure even shaping. Maintain consistent tension to avoid puckering or looseness. Once the body reaches the desired size, secure it with a slip stitch and prepare to move on to the next part of your cow.
4.2. Creating the Head and Ears
Begin by crocheting the head using a magic ring to form a tight circle. Work in continuous rounds, increasing stitches gradually to shape the head smoothly. Ensure the head is evenly rounded and seamless. For the ears, crochet small triangles separately, then attach them to the top of the head using a tapestry needle. Use a smaller hook size for the ears to maintain proportion. Stuff the ears lightly before attaching to give them a natural appearance. Make sure the ears are symmetrical and securely fastened. This step requires attention to detail to achieve the Highland Cow’s distinctive features. Proper shaping ensures a lifelike look.
4.3. Adding Horns and Eyes
To bring your Highland Cow to life, start by crocheting small horn shapes and attach them securely to the top of the head. Use a tapestry needle to weave in ends. For the eyes, choose black yarn or safety eyes for a realistic look. Sew or crochet them in place, ensuring they are evenly spaced and aligned. Add subtle details like eyelashes or eyebrows using a fine yarn or embroidery floss for extra character. Make sure the horns are firmly attached to prevent them from coming loose over time. These small details will give your Highland Cow a charming and lifelike appearance.
4.4. Crocheting the Legs and Tail
Crocheting the legs and tail of your Highland Cow is a crucial step that brings your project to life. Start by creating four identical leg pieces, using single crochet stitches to shape them. Ensure each leg is sturdy enough to support the body and evenly spaced for balance. Once the legs are complete, attach them securely to the underside of the body. Next, crochet a long, slender tail, using a similar stitch pattern. Attach the tail to the back of the body, positioning it to mimic a natural, relaxed posture. Proper stuffing and alignment are key to achieving a realistic look.
Customizing Your Highland Cow
Personalize your Highland Cow with unique touches. Choose realistic earthy tones or vibrant hues. Add accessories like scarves or hats. Adjust the size for different looks or purposes.
5.1. Choosing Colors for a Realistic Look
To create a realistic Highland Cow, choose colors that mimic its natural coat. Opt for earthy tones like deep reds, browns, and tans, which are characteristic of the breed. White markings on the face, legs, and belly add authenticity. Use a color wheel to ensure harmony and contrast. For a more subtle look, blend similar shades. Consider the background where the cow will be displayed to enhance its appearance. Black or dark brown yarn works well for details like eyes and horns. Experiment with layering colors to achieve depth and dimension. Select high-quality yarns with good stitch definition to bring your Highland Cow to life.
5.2. Adding Unique Accessories
Enhance your Highland Cow crochet with unique accessories to give it a personalized touch. Add a cozy scarf, a flower crown, or a bell collar for a charming, one-of-a-kind look. These small details can reflect your creativity and style, making your cow stand out. Use contrasting yarn colors or embroidery floss to create intricate patterns or textures. For a festive touch, try adding seasonal accessories like Santa hats or Easter bows. You can also experiment with fabric paint or appliques for extra flair. These accessories are simple to crochet or attach, offering endless possibilities to make your Highland Cow truly special and full of character.
- Use small crochet flowers or bows for a delicate look.
- Try adding a tiny bell or bead for a rustic charm.
- Experiment with seasonal themes for holiday-specific designs.
These accessories are not only fun to create but also add a personal touch to your finished Highland Cow, making it a unique and thoughtful gift or decoration.
5.3. Adjusting the Size of the Cow
To customize the size of your Highland Cow, you can adjust the hook size, yarn weight, or stitch count. A larger hook and thicker yarn will create a bigger cow, while a smaller hook and finer yarn will result in a smaller one. You can also add or reduce stitches in each round or row to achieve the desired dimensions. For consistency, ensure proportional adjustments across all body parts. Measure your work as you go and tweak accordingly. This flexibility allows you to craft a Highland Cow that fits your vision, whether it’s a tiny charm or a plush companion.
Advanced Techniques for a Realistic Highland Cow
Elevate your Highland Cow crochet with advanced techniques like fuzzy coats, textured ears, and posable joints for a lifelike appearance that captures the essence of this majestic animal.
6.1. Creating a Fuzzy Coat Effect
To achieve a realistic Highland Cow look, focus on creating a fuzzy coat effect. Use a combination of yarn types, such as mohair or bouclé, which naturally have a fuzzy texture. For an extra fluffy appearance, brush the finished crochet with a stiff-bristle brush or use a fabric shaver to gently tease out fibers. Some patterns incorporate loop stitches or tall stitches like the treble crochet to mimic the shaggy layers of a Highland Cow’s coat. Layering yarns in different shades can also add depth and dimension, ensuring your cow looks as cozy and rugged as the real thing.
6.2. Adding Texture to the Ears and Horns
To create a lifelike Highland Cow, adding texture to the ears and horns is essential. Use slip stitches or back loop-only crochet to mimic the rough, natural texture of the cow’s features. For the horns, try layering yarn in a way that builds up a rugged surface. Experiment with different stitch sizes to create depth and dimension. You can also use a textured yarn or add fabric paint for a more realistic look. By incorporating these techniques, your Highland Cow will have a charming, authentic appearance that captures the spirit of the breed.
6.3. Posable Joints for a Lifelike Appearance
To create a Highland Cow with a lifelike appearance, incorporating posable joints is a great technique. Use small joint discs or wire to allow the legs, head, and tail to move naturally. This adds realism and makes the cow more interactive. Start by sewing the joints into the body before stuffing, ensuring they are secure. Test the movement to ensure flexibility without looseness. This method is especially useful for creating a poseable Highland Cow that can mimic real-life movements, making it a standout piece. With careful placement and adjustment, your crochet cow will have a charming, lifelike quality that captivates anyone who sees it.

Troubleshooting Common Mistakes
Troubleshooting common mistakes is essential for achieving professional results. Identify and fix issues like uneven stitches, misshapen body parts, or misaligned features to ensure your Highland Cow crochet turns out perfectly.
7.1. Fixing Uneven Stitches
Uneven stitches can occur due to variations in tension or inconsistent hook placement. To fix this, first, assess the stitch pattern and identify where the unevenness begins. Gently unravel the affected rows without damaging the yarn. Re-crochet the section, paying close attention to maintaining consistent tension and stitch count. Use a stitch marker to track your progress and ensure each row aligns properly. If stitches appear too loose or tight, adjust your hook size slightly or practice the stitch until it feels natural. Even small adjustments can make a significant difference in achieving a smooth, professional finish.
7.2. Adjusting the Shape of the Body
If your Highland Cow’s body isn’t shaping as expected, there are simple fixes. To make it slimmer, reduce the number of stitches in the next round. For a bulkier appearance, add more stitches or use a larger hook. Adjusting the stuffing amount can also help achieve the desired shape. If the body is uneven, check your tension and ensure consistent stitching. Use stitch markers to track increases or decreases, and make adjustments gradually. Tweaking the body shape early on ensures a balanced look before moving to other features like the head or legs. This step is crucial for a proportional and lifelike Highland Cow.
7.3. Correcting Misaligned Features
Misaligned features, such as uneven eyes or horns, can detract from your Highland Cow’s charm. To fix this, carefully count stitches to ensure symmetry and gently adjust positioning. Use a tapestry needle to relocate features without unraveling. For ears or horns, remove the stitches holding them in place, then reattach using a small amount of yarn. Ensure the face is centered by measuring from the top of the head to the muzzle. Patience is key—small adjustments can make a big difference. Regularly checking your work as you go can help prevent misalignment and save time in the long run. Proper alignment enhances the cow’s lifelike appearance and ensures a professional finish.
Displaying and Caring for Your Finished Highland Cow
Showcase your Highland Cow crochet creation on a shelf or in a cozy basket. Store it in a dry place to avoid moisture damage and mildew. Gently hand-wash if needed, reshaping while wet for optimal care.
8.1. Creative Ways to Display Your Crochet Cow
Your Highland Cow crochet can be a charming addition to any room. Display it on a rustic wooden shelf or in a cozy corner with a natural backdrop. Create a themed diorama with small props like hay, flowers, or even tiny fencing for a countryside feel. You can also use it as a seasonal decoration, incorporating it into holiday displays like Christmas or Easter setups. For a personalized touch, place your crocheted cow on a custom base with its name or a meaningful date. It’s also a great prop for photo booths or kids’ play areas, adding a playful, handcrafted element to your space. Show it off with pride!
8.2. Tips for Storing Your Crochet Projects
To keep your Highland Cow crochet project in pristine condition, store it in a clean, dry environment. Use a breathable fabric bag or airtight container to protect it from dust and moisture. Avoid direct sunlight to prevent color fading. For long-term storage, gently stuff the cow with tissue paper to maintain its shape. Do not fold or compress the item excessively, as this may cause creases. Consider storing it away from pets or children to prevent accidental damage. Clean the crochet cow before storing to ensure no dirt or oils are trapped. These simple steps will help preserve your handiwork for years to come.
8.3. Cleaning and Maintaining Your Crochet Cow
To keep your Highland Cow crochet looking its best, gentle care is essential. Spot clean stains with a soft brush and mild detergent, avoiding harsh chemicals. For larger cleaning needs, hand wash in cold water using a mild yarn-safe detergent. Gently reshape while wet and lay flat to air dry. Avoid machine washing or drying, as this can distort the stitches or damage the fiber. Regularly brushing the yarn with a soft-bristle brush will help maintain its texture and appearance. Store your cow in a dry, clean environment to prevent dust buildup. By following these steps, your crocheted Highland Cow will remain vibrant and well-preserved for years to come.
Sharing Your Highland Cow Creation
Share your finished Highland Cow with pride! Showcase it on social media, give it as a heartfelt gift, or sell your unique creation to crochet enthusiasts.
9.1. Taking Great Photos for Social Media
To showcase your Highland Cow crochet project effectively on social media, use natural lighting and a clean, simple background. Opt for soft pastels or neutral tones to highlight the cow’s details. Experiment with angles, such as slightly above or at eye level, to create visually appealing compositions. Add props like tiny flowers, baskets, or rustic items to tell a story. Style your cow in lifelike poses or with fun accessories to capture personality. Edit photos to enhance colors and brightness without over-processing. Finally, share your work with relevant hashtags and tag crochet communities to connect with fellow crafters and gain inspiration from their creations. This will help your Highland Cow stand out and attract admiration online.
9.2. Gifting Your Crochet Cow to Loved Ones
Gifting your handmade Highland Cow crochet project is a thoughtful way to share your creativity with family and friends. Perfect for birthdays, holidays, or just because, this unique gift carries personal touches that store-bought items lack. Consider personalizing the cow with colors or accessories that match the recipient’s style. Packaging it in a decorative box or bag with a handwritten note adds a charming finishing touch. For new parents, it makes a soft, cuddly toy for their little ones. Whether for a loved one or a charity donation, your Highland Cow crochet creation spreads joy and showcases your skillful craftsmanship.
9.3. Selling Your Highland Cow Crochet Pattern
If you’ve created a unique Highland Cow crochet pattern, consider turning it into a profitable venture. Platforms like Etsy, eBay, or even your own website are great for selling digital downloads.
Highlight the pattern’s unique features, such as its realistic design or ease of use, to attract buyers. Include high-quality photos and clear instructions to showcase its value.
Research competitors to set a competitive price, and consider offering a free PDF sample to build trust. You can also market your pattern on social media or crochet communities to reach a wider audience.
Ensure you have the rights to sell the pattern and consider adding a copyright notice. With the right approach, your Highland Cow crochet pattern can become a popular and profitable product.
Crocheting a Highland Cow is a fulfilling craft that combines creativity with precision. Completing this project brings a sense of accomplishment and joy, perfect for gifting or cherishing.
10.1. Final Thoughts on Crocheting a Highland Cow
Crocheting a Highland Cow is a rewarding and creative journey that combines skill, patience, and imagination. Whether you’re a seasoned crafter or a beginner, this project offers a sense of accomplishment and joy. The process allows you to bring a charming, cuddly companion to life, perfect for gifting or personal enjoyment. With a free PDF pattern, you can easily follow step-by-step instructions, making it accessible for everyone. The finished Highland Cow crochet will not only be a testament to your creativity but also a warmth-filled keepsake. Embrace the process, enjoy the crafting experience, and celebrate the unique charm of your handmade Highland Cow.