jcloud diffuser instructions pdf

The JCloud Diffuser is a smart scent air machine designed for aromatherapy, offering waterless cold air diffusion and coverage up to 4500 sq․ ft․

1․1 Overview of the JCloud Smart Scent Air Machine

The JCloud Smart Scent Air Machine is a cutting-edge, waterless cold air diffusion system designed for large spaces up to 4500 sq․ ft․ It utilizes advanced technology to distribute scents evenly without water, making it ideal for aromatherapy and essential oil diffusion․ Suitable for homes, hotels, and offices, this device offers smart features like app control and customizable settings, ensuring a personalized fragrance experience․ Its sleek design and efficient operation make it a perfect solution for enhancing ambiance and well-being in any environment․

1․2 Benefits of Using the JCloud Diffuser

The JCloud Diffuser offers numerous benefits, including its waterless cold air diffusion technology, which ensures efficient scent distribution without moisture․ It covers large areas up to 4500 sq․ ft․, making it ideal for both residential and commercial spaces․ The device promotes aromatherapy benefits, enhances air quality, and creates a pleasant ambiance․ Its smart features, such as app control and customizable settings, provide convenience and a personalized experience, while its sleek design complements any interior decor seamlessly․

Features and Benefits

The JCloud Diffuser offers a large coverage area, waterless cold air diffusion, and customizable settings via an app, ensuring efficient and convenient scent distribution for large spaces․

2․1 Large Coverage Area: Up to 4500 Sq․ Ft․

The JCloud Diffuser efficiently covers spaces up to 4500 sq․ ft․, ideal for large homes, offices, or commercial areas․ Its advanced cold air diffusion technology ensures even scent distribution without water, making it perfect for maintaining consistent fragrance in expansive environments․ This feature makes it a versatile choice for both residential and professional settings, providing a seamless aromatic experience across large areas with minimal effort required․

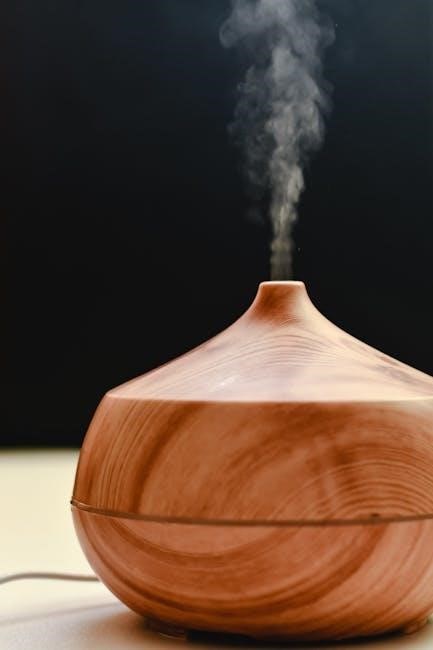
2․2 Waterless Cold Air Diffusion Technology

The JCloud Diffuser employs waterless cold air diffusion technology, eliminating the need for water while effectively distributing fragrance․ This method uses advanced nebulization to release essential oils directly into the air, ensuring a potent and consistent scent without dilution․ Unlike traditional ultrasonic diffusers, this waterless system is more efficient and mess-free, making it ideal for large spaces and professional environments where a strong, uninterrupted aroma is desired․ This technology enhances the overall diffusion experience, offering reliability and performance․

2․3 Customizable Settings for Personalized Experience

The JCloud Diffuser offers customizable settings to tailor your aromatherapy experience․ Using the Aroma-Link app, you can adjust scent intensity, set timers, and schedule operations․ This allows you to personalize fragrance strength and duration to suit your preferences․ Additionally, the diffuser supports intermittent operation, enabling you to create a consistent yet flexible scent distribution․ These features ensure a tailored experience, making the JCloud Diffuser adaptable to various environments and user needs for optimal comfort and enjoyment․

Setup and Installation

Setting up the JCloud Diffuser involves unboxing, initial configuration, and placement․ Ensure proper positioning for optimal airflow and connectivity to power for seamless operation․

3․1 Unboxing and Initial Setup

Upon unboxing the JCloud Diffuser, ensure all accessories are included, such as the spray nozzle, device lock, and atomizer head․ Begin by cleaning the device with rubbing alcohol to remove any manufacturing residue․ Inspect for damage and ensure all parts are securely attached․ Plug in the diffuser and familiarize yourself with the controls․ Download the Aroma-Link app for smart functionality, but refer to the dedicated section for detailed app setup instructions․

3․2 Placement Recommendations for Optimal Performance

For optimal performance, place the JCloud Diffuser in a central location to ensure even fragrance distribution․ Position it at least 3 feet away from walls and furniture to maximize air circulation․ Avoid direct sunlight or moisture-rich areas to prevent damage․ For large spaces, consider placing it near an HVAC vent to enhance scent distribution․ Ensure the diffuser is on a stable, flat surface and away from direct heat sources․ This setup ensures efficient operation and consistent scent coverage up to 4500 sq․ ft․

3․3 Connecting to Power and Basic Configuration

Plug the JCloud Diffuser into a nearby power outlet using the provided cable․ Ensure the device is fully connected and turn it on․ The LED lights will indicate successful power-up․ Use the Aroma-Link app to configure basic settings like scent intensity and timer․ Pairing with Bluetooth requires entering the default password “1234․” Follow in-app instructions to complete the setup for personalized fragrance control and optimal performance․ This step ensures seamless operation and tailored aromatic experiences․

Operating Instructions

Power on the JCloud Diffuser, understand basic functions, and set up intermittent operation mode for a customized experience using essential oils and smart app controls․

4․1 Powering On the Diffuser

To power on the JCloud Diffuser, ensure it is connected to a power source and plugged in properly․ The device will automatically start in default mode․ For intermittent operation, set the working time (3-10 seconds) and pause duration (2-10 minutes) via the app or manual controls․ This ensures efficient scent diffusion without continuous operation․ Always follow the guidelines for optimal performance and energy efficiency․

4․2 Understanding Basic Functions and Controls

The JCloud Diffuser features intuitive controls for seamless operation․ The basic functions include power on/off, scent intensity adjustment, and timer settings․ Use the control panel or app to customize settings․ The device operates in intermittent mode, working for 3-10 seconds and pausing for 2-10 minutes, which can be adjusted based on preferences․ Familiarize yourself with these functions to maximize your aromatherapy experience and ensure efficient scent distribution in your space․

4․3 Setting Up Intermittent Operation Mode

To set up intermittent operation mode, access the mode via the app or control panel․ Customize the work time (3-10 seconds) and pause duration (2-10 minutes) based on your preference․ Once configured, the diffuser will automatically cycle between operation and pause phases․ This mode helps maintain a consistent scent without over-saturating the air․ The default settings can be adjusted to optimize fragrance distribution and energy efficiency, ensuring a balanced aromatherapy experience in your space․

Connecting to HVAC System

The JCloud Diffuser integrates seamlessly with your HVAC system, enhancing scent distribution․ Adjust intensity levels for optimal performance and even fragrance dispersion throughout your space․

5․1 Steps to Integrate with Your HVAC System

To integrate the JCloud Diffuser with your HVAC system, ensure the HVAC fan is on for consistent airflow․ Adjust the diffuser’s intensity levels, typically 10-15% higher than standalone use, for optimal scent distribution․ Use the Aroma-Link app to configure settings remotely․ Ensure the diffuser is placed near air ducts to maximize fragrance circulation․ Refer to the user manual for detailed setup instructions to avoid scent buildup and ensure smooth operation․

5․2 Tips for Effective Scent Distribution via HVAC

Ensure consistent airflow by running the HVAC fan periodically, even when cooling or heating is inactive․ Adjust the diffuser’s intensity levels 10-15% higher than standalone use to prevent weak scent distribution․ Place the diffuser near air ducts for optimal fragrance circulation․ Avoid prolonged operation with the fan off to prevent scent buildup․ Use the app to set timers, ensuring the diffuser operates during peak airflow times for even distribution and a refreshing aroma throughout your space․

5․3 Adjusting Intensity Levels for HVAC Setup

For optimal scent distribution via HVAC, increase the diffuser’s intensity levels by 10-15% compared to standalone use․ Use the Aroma-Link app to fine-tune settings, ensuring consistent fragrance circulation․ Adjust the output based on airflow strength to avoid overpowering or weak scents․ Regularly monitor and modify intensity to maintain desired aroma levels, especially in larger spaces or systems with varying air duct layouts․

Smart App Control

The JCloud Diffuser integrates seamlessly with the Aroma-Link app, enabling users to customize settings, adjust scent intensity, and schedule operations remotely for a personalized experience․

6․1 Downloading and Installing the Aroma-Link App

To control the JCloud Diffuser, download the Aroma-Link app by scanning the QR code provided in the product manual or searching for it in your app store․

Once downloaded, install the app and ensure your device’s Bluetooth is enabled for pairing with the diffuser․

After installation, open the app and follow the prompts to connect your JCloud Diffuser, entering the default password 1234 if required․

6․2 Connecting the Diffuser to the App via Bluetooth

Enable Bluetooth on your smartphone and open the Aroma-Link app․ The app will automatically search for nearby devices and display the JCloud Diffuser․

Select the diffuser from the list to initiate pairing․ If prompted, enter the default password 1234 to complete the connection․

Once connected, the app will confirm successful pairing, allowing you to control settings like scent intensity and timers remotely․

6․3 Customizing Settings: Scent Intensity and Timers

Using the Aroma-Link app, users can easily customize scent intensity and timer settings for a personalized experience․ Adjust the fragrance strength to suit your preference and set specific intervals for operation․

The app allows you to program the diffuser to work intermittently, with customizable cycles of 3-10 seconds of operation followed by pauses of 2-10 minutes, ensuring efficient scent distribution without overuse․

Using Essential Oils

The JCloud Diffuser is designed to work seamlessly with essential oils, enhancing your space with natural fragrances while promoting relaxation and well-being through aromatherapy․

7․1 Benefits of Essential Oils with the JCloud Diffuser

Essential oils enhance the JCloud Diffuser’s performance, providing aromatherapy benefits, improving mood, and purifying the air․ They promote relaxation, reduce stress, and create a refreshing atmosphere, while their natural properties support overall well-being․ The diffuser’s waterless technology preserves oil potency, ensuring a consistent and intense fragrance experience․ By incorporating essential oils, users can customize their space with natural scents, fostering a calming and invigorating environment tailored to their preferences․

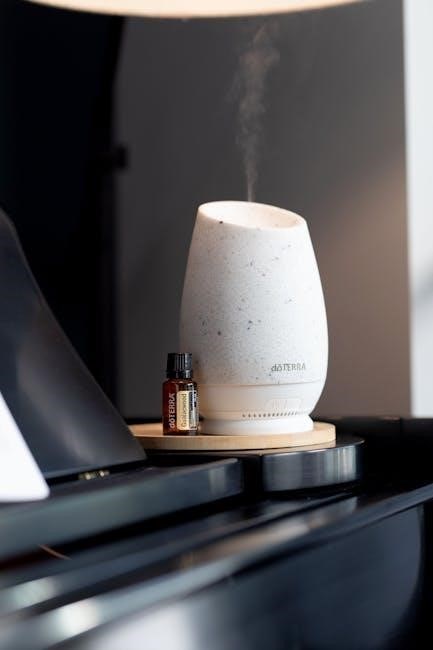
7․2 Guidelines for Adding Essential Oils

Add 5-10 drops of high-quality essential oils to the fragrance oil bottle․ Use pure, undiluted oils for optimal results․ Avoid overfilling to prevent leakage․ For cleaning, fill the empty oil bottle with 1/4 inch of rubbing alcohol, then screw on the spray nozzle and shake gently․ This ensures the system remains clean and free of residue․ Always use compatible oils to maintain the diffuser’s performance and longevity, and refer to the user manual for specific recommendations․

7․3 Recommended Essential Oil Types and Blends

For optimal performance, use high-quality, pure essential oils․ Popular choices include lavender for relaxation, lemon for freshness, and eucalyptus for invigorating spaces․ Blends like citrus mixes or floral combinations enhance ambiance․ The JCLOUD Hotel Diffuser Oils Set offers luxury options inspired by premium hospitality scents․ Always choose oils compatible with the diffuser to avoid damage․ For the best experience, refer to the user manual for specific recommendations on oil types and blends tailored to your preferences and space needs․

Maintenance and Cleaning

Regularly clean the diffuser using rubbing alcohol in the oil bottle to maintain performance․ Replace spray nozzles and atomizer heads as needed for optimal function and longevity․

8․1 Cleaning Instructions for the Diffuser

Clean the JCloud Diffuser regularly to ensure optimal performance․ Fill the empty oil bottle with 1/4 inch of rubbing alcohol․ Screw the bottle onto the diffuser and spray the alcohol inside to clean the interior․ Use a soft cloth to wipe down the exterior and internal components․ This process helps remove any residue and prevents scent buildup․ Regular cleaning ensures consistent fragrance diffusion and maintains the longevity of the device․

8․2 Replacing Parts: Spray Nozzle and Atomizer Head

Replace the spray nozzle and atomizer head periodically to maintain optimal performance․ Turn off the diffuser and unplug it before starting․ Use a screwdriver to remove the old parts, ensuring no oil residue remains․ Install the new spray nozzle and atomizer head securely․ This maintenance prevents oil buildup and ensures consistent scent diffusion․ Refer to the user manual for detailed diagrams and step-by-step guidance to complete the replacement process effectively․

8․3 Regular Maintenance for Optimal Performance

Regular maintenance ensures the JCloud Diffuser operates efficiently․ Clean the device with rubbing alcohol to remove oil residue․ Check for buildup in the atomizer head and spray nozzle․ Wipe surfaces with a soft cloth to prevent damage․ Ensure the device is unplugged before cleaning․ Perform maintenance every 1-3 months, depending on usage․ This routine preserves scent quality and extends the product’s lifespan․ Always refer to the user manual for detailed guidance on maintaining your JCloud Diffuser effectively․

Troubleshooting Common Issues

The JCloud Diffuser may face connectivity or intermittent operation issues․ Refer to the user manual for step-by-step solutions to resolve these problems and ensure smooth functionality․

9․1 Resolving Connectivity Problems

To resolve connectivity issues with the JCloud Diffuser, ensure Bluetooth is enabled on your device․ Scan the QR code in the manual to download the Aroma-Link app․ Connect via Bluetooth by selecting the diffuser from the available devices list․ If issues persist, restart both the diffuser and your phone․ Check for app updates and ensure the diffuser is in pairing mode․ If problems remain, refer to the troubleshooting section in the JCloud Diffuser Instructions PDF for additional guidance․

9․2 Addressing Scent Buildup in Ducts

Scent buildup in ducts can occur if the diffuser operates for extended periods with the AC fan off․ To resolve this, ensure the AC fan runs periodically to circulate air․ Increase scent intensity levels by 10-15% when connected to HVAC systems․ Regularly clean ducts and check for blockages․ Refer to the JCloud Diffuser Instructions PDF for detailed guidance on preventing scent buildup and maintaining optimal airflow in your HVAC system․

9․3 Fixing Intermittent Operation Issues

Intermittent operation issues with the JCloud Diffuser can often be resolved by resetting the device․ Press and hold the first and fourth buttons simultaneously, then select “Yes” to reset to factory settings․ Ensure the device is properly connected to power and that the spray nozzle is clean․ Refer to the JCloud Diffuser Instructions PDF for step-by-step troubleshooting and maintenance tips to restore smooth operation and prevent future interruptions․

Resetting to Factory Defaults

Resetting the JCloud Diffuser restores it to factory settings․ Press and hold the first and fourth buttons simultaneously, then confirm the reset․ This process ensures optimal performance․

10․1 When to Reset the Diffuser

Reset the JCloud Diffuser when experiencing connectivity issues, inconsistent scent output, or after updating settings․ A reset restores default parameters, ensuring proper function and optimal performance․ This step is recommended if the device malfunctions or fails to respond to controls․ Resetting helps resolve software glitches and prepares the device for new configurations or troubleshooting․ Always back up custom settings before performing a factory reset․

10․2 Step-by-Step Reset Process

To reset the JCloud Diffuser, press and hold the first and fourth buttons simultaneously for five seconds․ A confirmation prompt will appear on the screen․ Select “Yes” to proceed․ The device will restart, restoring factory settings․ Ensure the diffuser is powered on during this process․ After resetting, reconnect to the app and reconfigure settings as needed․ This process erases all customizations, so settings must be reprogrammed for optimal performance․

10․3 Understanding Factory Mode Operations

Factory Mode resets the JCloud Diffuser to its default settings, ensuring consistent performance․ In this mode, the diffuser operates intermittently, working for 3-10 seconds (depending on the model) followed by a pause․ Custom settings, such as scent intensity and timers, are erased, restoring the device to its original configuration․ Factory Mode is ideal for troubleshooting or starting fresh, providing a baseline for reconfiguring the diffuser to meet specific needs․ This mode ensures optimal performance across various environments․

Accessories and Optional Equipment

The JCloud Diffuser includes accessories like a spray nozzle, device lock, and atomizer head․ Additional equipment can be purchased for enhanced functionality and performance․

11․1 Included Accessories: Spray Nozzle, Device Lock, etc․

The JCloud Diffuser comes with essential accessories like a spray nozzle for efficient scent distribution, a device lock for security, and an atomizer head for oil diffusion․ These components ensure optimal performance and convenience, enhancing your aromatherapy experience․ The spray nozzle is designed for even fragrance release, while the device lock prevents unauthorized use․ The atomizer head is crucial for transforming essential oils into a fine mist, ensuring a consistent and enjoyable scent diffusion process․

11․2 Optional Equipment for Enhanced Performance

Optional equipment like the JCLOUD Hotel Diffuser Oils Set offers luxury scents, while the JCLOUD A6 Smart Scent Air Machine Pro 800ML provides advanced features․ These additions enhance fragrance diffusion and customization, ensuring a superior aromatherapy experience․ The Pro version includes larger capacity and improved smart controls, allowing for better scent distribution and personalized settings․ These optional upgrades cater to users seeking enhanced performance and versatility in their diffuser setup․

11․4 Where to Purchase Additional Accessories

Additional accessories for the JCloud Diffuser, such as the JCLOUD Hotel Diffuser Oils Set, can be purchased on Amazon or through the JCLOUD official website․ Visit Amazon for the JCloud Aroma Diffuser and related products․ The official JCLOUD website also offers exclusive bundles and optional equipment for enhanced performance․ Customers are advised to check the official website for the latest availability and purchasing options to ensure authenticity and compatibility with their JCloud Diffuser model․

Safety Precautions

Ensure safe usage by avoiding direct contact with essential oils, keeping the device out of children’s reach, and following recommended usage times to prevent scent buildup․

12․1 General Safety Guidelines

Always place the JCloud Diffuser on a stable, flat surface to prevent accidental tipping․ Keep it out of reach of children and pets to avoid any potential hazards․ Avoid exposing the device to extreme temperatures or moisture, as this may damage internal components․ Regularly inspect the power cord and connections for signs of wear․ Ensure proper ventilation in the room to prevent scent buildup․ Follow all usage instructions carefully to maintain optimal performance and safety․ Never submerge the device in water or clean it with abrasive materials․ Adhere to essential oil usage guidelines to prevent skin irritation or allergic reactions․ By following these precautions, you can enjoy a safe and effective diffusing experience․ Always unplug the device before cleaning or performing maintenance․ Refer to the user manual for detailed safety recommendations; Maintain a safe distance from open flames or sparks, as essential oils can be flammable․ Use only high-quality, pure essential oils to avoid clogging the device․ If you notice any unusual odors or malfunction, discontinue use immediately and contact customer support․ Regular maintenance, such as cleaning the atomizer head, is crucial for prolonging the device’s lifespan․ Never operate the diffuser for extended periods without breaks, as specified in the intermittent operation mode․ Ensure the device is placed away from direct sunlight to prevent overheating․ Always follow the manufacturer’s instructions for replacing parts like the spray nozzle or atomizer head․ Keep the device away from sensitive electronics to avoid interference․ Store the diffuser and essential oils in a cool, dry place when not in use․ By adhering to these guidelines, you can ensure a safe and enjoyable experience with your JCloud Diffuser․ Always prioritize safety to prevent any potential risks associated with improper usage․ This will not only protect your device but also ensure a pleasant and hazard-free environment for everyone․ Remember, safety is paramount when using any electronic device, especially one that involves essential oils and scent diffusion․ Always be mindful of your surroundings and the people around you when operating the diffuser․ If you have specific health conditions or allergies, consult a healthcare professional before using essential oils․ This will help you avoid any adverse reactions and make the most of your aromatherapy experience․ For further safety information, refer to the JCloud Diffuser instructions PDF or contact customer support for assistance․ Your safety and satisfaction are our top priorities․

12․2 Precautions for Specific Operating Conditions

For specific operating conditions, ensure the JCloud Diffuser is used in well-ventilated areas, especially with strong essential oils․ Avoid placing it near open flames or sparks, as essential oils can be flammable․ In humid environments, reduce scent intensity to prevent buildup․ When connected to an HVAC system, maintain higher intensity levels to ensure even distribution․ Do not operate the diffuser near sensitive electronic equipment to avoid interference․ In direct sunlight, it may overheat, so place it in a shaded area․ For optimal performance, avoid extreme temperatures or damp environments․ Always monitor the device during prolonged use to prevent overheating․ Keep it away from air conditioning vents to avoid scent concentration․ In areas with high dust levels, clean the device more frequently to maintain efficiency․ When using the diffuser in small, enclosed spaces, reduce the operating time to prevent overwhelming the environment․ Never use the diffuser in areas with hazardous materials or flammable substances․ For areas with sensitive equipment, such as laboratories or hospitals, ensure the diffuser does not interfere with critical systems․ Always follow the manufacturer’s guidelines for specific operating conditions to ensure safe and effective use․ Regularly inspect the device for signs of wear, especially in high-traffic or industrial settings․ By adhering to these precautions, you can ensure the JCloud Diffuser operates safely and efficiently under various conditions․ This will also help extend the lifespan of the device and maintain a pleasant aromatic experience․ Always prioritize caution in unique or challenging environments to prevent potential issues․ Your safety and satisfaction are our top priorities․

12․3 Safety Tips for Essential Oil Usage

Always use high-quality, pure essential oils to ensure safe and effective diffusion․ Avoid applying undiluted oils directly on skin or sensitive areas like the face or eyes․ Keep the diffuser out of reach of children and pets to prevent accidental ingestion․ Dilute strong essential oils with a carrier oil before use, especially for sensitive individuals․ Perform a patch test before using new oils to check for allergies․ Avoid using certain oils around pets, as they may cause adverse reactions․ Never ingest essential oils unless directed by a healthcare professional․ Store oils in a cool, dark place to maintain their potency and safety․ Use caution when diffusing oils during pregnancy, breastfeeding, or with allergies․ Refer to the JCloud Diffuser instructions for specific guidelines on oil usage and safety․ By following these tips, you can enjoy a safe and beneficial aromatherapy experience with your JCloud Diffuser․ Always prioritize safety to maximize the benefits of essential oils․

The JCloud Diffuser offers advanced features and seamless operation, making it an ideal choice for enhancing your home or workspace ambiance with aromatherapy․ By following the guide, you can maximize its performance and enjoy a personalized scent experience effortlessly․

13․1 Summary of Key Features and Benefits

The JCloud Diffuser excels with its large coverage area of up to 4500 sq․ ft․, waterless cold air diffusion technology, and customizable settings for a personalized experience․ It seamlessly integrates with HVAC systems for efficient scent distribution and offers smart app control for easy operation․ Designed for essential oils, it ensures optimal performance with minimal maintenance․ Its advanced features and user-friendly design make it an excellent choice for aromatherapy in homes, offices, or large spaces, providing a consistent and enjoyable fragrance experience․

13․2 Final Tips for Maximizing Your JCloud Diffuser Experience

For optimal results, clean the diffuser regularly and use high-quality essential oils․ Experiment with oil blends to create unique fragrances․ Adjust settings via the app to customize scent intensity and timers․ Ensure proper placement in large spaces for even fragrance distribution․ Utilize the intermittent operation mode to conserve oils and maintain consistent scent levels․ Refer to the user guide for troubleshooting and maintenance tips to extend the device’s lifespan and performance․

first suite in e flat pdf

Gustav Holst’s First Suite in E Flat is a cornerstone of wind band repertoire, composed in 1909 and published in 1917․ Its three movements—Chaconne, Intermezzo, and March—exemplify Holst’s masterful orchestration and enduring melodic gift․ Widely available in PDF format, it remains a frequently performed work, showcasing his innovative approach to military band composition․

1․1 Historical Context of the Composition

Gustav Holst composed the First Suite in E Flat in 1909, a period of significant transformation in wind band music․ The suite was premiered in 1920 at the Royal Military School of Music, marking a milestone in the evolution of the concert band genre․ Holst’s work was groundbreaking, as it elevated the military band to a legitimate artistic medium, blending traditional and innovative elements․ This composition reflects the early 20th-century shift toward more complex and expressive wind band repertoire, influenced by Holst’s unique harmonic and melodic style․

1․2 Significance in Wind Band Repertoire

Gustav Holst’s First Suite in E Flat is a cornerstone of wind band literature, celebrated for its innovative composition and enduring appeal․ As one of the earliest major works for military band, it set a new standard for the medium, blending traditional and modern elements․ The suite’s technical and musical challenges have made it a benchmark for ensembles, while its rich melodies and harmonic depth continue to inspire musicians and composers․ Its influence is evident in the development of 20th-century band music, solidifying its place as a foundational work in the repertoire․

1․3 Availability in PDF Format

Gustav Holst’s First Suite in E Flat is widely available in PDF format, making it accessible to musicians and educators worldwide․ The suite can be downloaded from platforms like 8notes․com and other reputable sheet music repositories․ Various arrangements, including piano solos and clarinet quartets, are also accessible online․ Additionally, learning guides and practice tips accompany the PDF scores, aiding musicians in mastering the piece․ This ease of access ensures the suite remains a popular choice for both performance and study․

Composition and Structure

Gustav Holst’s First Suite in E Flat comprises three movements: Chaconne, Intermezzo, and March․ The Chaconne features a ground bass with 16 variations, showcasing Holst’s structural mastery․

2․1 Overview of the Three Movements

Gustav Holst’s First Suite in E Flat is structured into three distinct movements: Chaconne, Intermezzo, and March․ The Chaconne opens with a ground bass, unfolding through 16 variations that showcase Holst’s mastery of thematic development․ The Intermezzo provides contrast with its delicate, lyrical melodies and shifting harmonies․ The final March is a grand, triumphant conclusion, blending robust rhythms with soaring themes․ Together, these movements demonstrate Holst’s innovative approach to wind band composition, balancing complexity with accessibility․

2․2 Chaconne: The First Movement

The Chaconne, the first movement of Holst’s First Suite in E Flat, is built on an eight-bar ground bass, presented in 16 variations․ The bass melody evolves through strict statements, inversions, and key modulations, showcasing Holst’s mastery of thematic development․ The movement begins in E-flat, with variations transitioning through C minor and other keys, culminating in a dramatic return to E-flat․ This structure demonstrates Holst’s innovative use of basso ostinato, creating a rich, layered sound that defines the movement’s complexity and depth․

2․3 Intermezzo: The Second Movement

The Intermezzo, as the second movement, contrasts the Chaconne with its lyrical and reflective nature․ It features a slower tempo, emphasizing melodic beauty and harmonic richness․ Holst’s use of counterpoint and texture creates a sense of dialogue between instruments, while the key transitions add depth․ This movement highlights Holst’s ability to craft both robust and delicate passages, making it a standout in the suite․ Its availability in PDF format has ensured its study and performance by musicians worldwide, showcasing its enduring appeal and artistry․

2․4 March: The Final Movement

The March, as the final movement of Holst’s First Suite in E Flat, is a triumphant conclusion characterized by strong rhythmic energy and a majestic melody․ Composed in 1909, it features a bold, military-like theme that opens in E Flat, transitioning through various keys to enhance dramatic impact․ The brass section dominates with confident fanfares, while woodwinds provide contrasting legato passages․ Dynamic contrasts and a grand climax make this movement a crowd favorite, ensuring its frequent performance and study, especially through its availability in PDF format․

Orchestration and Arrangement

Gustav Holst’s First Suite in E Flat was originally composed for military band in 1909․ It features rich orchestration, with arrangements available for piano, clarinet quartet, and other ensembles, showcasing its versatility․ Notable transcriptions and editions, including those by Colin Matthews, highlight its enduring appeal and adaptability, making it accessible in PDF format for diverse performances and study․

3․1 Original Instrumentation for Military Band

Gustav Holst’s First Suite in E Flat was originally composed for military band in 1909, showcasing his mastery of brass and woodwind instrumentation․ The score features a typical military band setup, including flutes, clarinets, saxophones, brass, and percussion․ The work is divided into three movements: Chaconne, Intermezzo, and March․ The original instrumentation highlights Holst’s innovative use of timbre and texture, making it a cornerstone of wind band repertoire․ The full score and parts are widely available in PDF format, with editions like the 1921 Boosey & Co․ publication remaining popular among ensembles․

3․2 Arrangements for Other Ensembles

The First Suite in E Flat has been transcribed for various ensembles, expanding its accessibility․ Arrangements include versions for piano solo, clarinet quartet, and even full orchestra, maintaining the original’s integrity․ These adaptations highlight the suite’s versatility and enduring appeal․ PDF scores of these arrangements are widely available, offering musicians diverse opportunities to perform and interpret Holst’s seminal work․ Such transcriptions ensure the suite remains relevant across different musical settings, preserving its artistic significance for modern ensembles․

3․3 Notable Transcriptions and Editions

The First Suite in E Flat has been adapted into notable transcriptions, including arrangements for piano solo and clarinet quartet․ Colin Matthews’ revised edition for military band is highly regarded, offering clarity and precision․ Additionally, the suite has been transcribed for full orchestra, preserving its original grandeur․ These transcriptions, available in PDF format, demonstrate the work’s adaptability․ They ensure Holst’s masterpiece remains accessible to diverse ensembles, maintaining its artistic integrity while broadening its performance possibilities․

Musical Elements and Techniques

Gustav Holst’s First Suite in E Flat showcases innovative techniques, including a ground bass in the Chaconne and harmonic innovations․ The work’s rhythmic complexity and melodic richness highlight Holst’s mastery of musical structure and orchestration․

4․1 Use of Ground Bass in the Chaconne

The Chaconne movement of Holst’s First Suite in E Flat is structured around a recurring eight-bar ground bass, presented in 16 variations․ The bass melody evolves from the tonic key of E-flat to the dominant key of D-flat, showcasing harmonic richness․ Twelve variations remain faithful to the original theme, while others feature strict inversions and modulations․ This technique underscores Holst’s mastery of thematic development and adds depth to the movement’s harmonic and melodic structure, making it a standout feature of the suite․

4․2 Harmonic and Melodic Innovations

Holst’s First Suite in E Flat showcases groundbreaking harmonic and melodic techniques․ The Chaconne employs modal interchange, blending E-flat major with C minor, creating a somber yet rich harmonic palette․ The Intermezzo introduces chromaticism and unexpected modulations, while the March features bold, triumphal melodies․ Holst’s use of thematic transformation and tonal contrasts highlights his innovative approach, setting the suite apart as a landmark in wind band literature and influencing future composers with its fresh harmonic and melodic vocabulary․

4․3 Rhythmic and Articulative Challenges

Holst’s First Suite in E Flat presents significant rhythmic and articulative demands․ The Chaconne features a persistent ground bass with intricate articulations, requiring precise execution․ The Intermezzo includes shifting meters and syncopation, challenging ensemble coordination․ The March demands bold, staccato brass playing and legato woodwind passages, emphasizing technical accuracy; These elements, combined with dynamic contrasts, test performers’ ability to maintain clarity and rhythmic precision, making the suite a benchmark for wind band virtuosity and interpretative skill․

Historical Performances and Premiere

Gustav Holst’s First Suite in E Flat was officially premiered in 1920 at the Royal Military School of Music․ The manuscript, completed in 1909, marks a significant milestone in wind band history․

5․1 Premiere at the Royal Military School of Music

Gustav Holst’s First Suite in E Flat premiered at the Royal Military School of Music in 1920, though it was composed in 1909․ This significant event, organized by Captain Arthur Bliss, showcased the suite’s innovative orchestration and melodic richness․ The premiere highlighted Holst’s ability to blend traditional military band elements with modern compositional techniques․ The performance was well-received, establishing the suite as a cornerstone of wind band repertoire and setting the stage for its enduring popularity in concerts and recordings․

5․2 Early Performances and Reception

Following its premiere, the First Suite in E Flat received enthusiastic reception for its innovative orchestration and melodic richness․ Early performances highlighted Holst’s ability to blend traditional military band elements with modern compositional techniques․ The suite’s availability in PDF format further facilitated its widespread adoption by ensembles worldwide․ Its enduring popularity stems from its masterful balance of complexity and accessibility, making it a cornerstone of wind band repertoire and a testament to Holst’s enduring influence on 20th-century music․

5․4 Modern Performances and Recordings

The First Suite in E Flat remains a staple in modern wind band repertoire, with frequent performances by ensembles worldwide․ Its enduring appeal lies in its timeless orchestration and melodic depth․ Modern recordings showcase its versatility, from professional ensembles to educational groups․ The suite’s availability in PDF format has further enhanced its accessibility, allowing musicians to study and perform it with ease․ Its influence is evident in contemporary compositions, solidifying its legacy as a foundational work in 20th-century band music․

Educational and Practical Resources

PDF guides and scores of Holst’s First Suite in E Flat are widely available, offering detailed learning goals, practice tips, and interpretation insights for musicians․ These resources enhance mastery of the suite’s challenging elements, aiding both individual and ensemble preparation․ Downloadable materials provide accessible tools for educational and practical applications, ensuring the work remains a cornerstone of musical education and performance․

6․1 Learning Goals for Musicians

Studying Holst’s First Suite in E Flat helps musicians master complex rhythms, articulations, and dynamics․ Players should focus on achieving precise ensemble balance, especially in the Chaconne’s ground bass․ Understanding the Intermezzo’s lyrical phrasing and the March’s grandeur is essential․ Musicians should grasp Holst’s harmonic innovations and melodic motifs․ Learning goals include developing proper breath control, intonation, and technical accuracy․ The suite also fosters teamwork and interpretive skills, preparing musicians for advanced repertoire and historical performance practices․ Mastery of this work enhances both individual and collective musical proficiency․

6․2 Practice Tips and Interpretation Guides

When preparing the First Suite in E Flat, musicians should focus on precise articulation and dynamic control․ Start with slow tempos to master intricate rhythms and melodic lines․ Sectional rehearsals can address balance issues, particularly in the Chaconne․ Emphasize legato phrasing in the Intermezzo and crisp articulation in the March․ Conductors should guide cohesive ensemble playing while highlighting Holst’s unique harmonic textures․ Practice with a metronome to ensure accurate tempos․ Interpretation guides suggest emphasizing the suite’s dramatic contrasts and emotional depth to capture its grandeur and elegance․

6․3 Downloading and Printing the PDF

The First Suite in E Flat is widely available in PDF format, accessible through reputable sources like 8notes․com and BandMusic PDF․ Musicians can download the full score or individual parts for practice and performance․ Ensure high-quality prints by using standard sheet music paper and proper printer settings․ Verify copyright compliance when accessing or sharing the PDF․ This convenient format allows seamless distribution and preparation for rehearsals, making it a valuable resource for wind bands and educators seeking to explore Holst’s iconic composition․

Cultural and Artistic Impact

Gustav Holst’s First Suite in E Flat profoundly influenced 20th-century band music, shaping its artistic evolution․ Its enduring legacy is evident in its widespread performances and adaptations, solidifying its importance in both military and concert band traditions, while its availability in PDF ensures continued accessibility and inspiration for future generations of musicians and composers․

7․1 Influence on 20th-Century Band Music

Gustav Holst’s First Suite in E Flat is widely regarded as a seminal work in 20th-century wind band repertoire․ Composed in 1909 and published in 1917, it set a new standard for military band composition, blending rich harmonies and intricate rhythms․ The suite’s innovative use of orchestration and thematic development inspired a generation of composers, shaping the evolution of band music․ Its enduring popularity, coupled with its availability in PDF format, has ensured its influence remains profound, making it a cornerstone of concert band traditions worldwide․

7․2 Role in Military and Concert Band Traditions

Gustav Holst’s First Suite in E Flat holds a pivotal role in both military and concert band traditions․ Originally composed for military bands, it was premiered at the Royal Military School of Music in 1920․ The suite’s robust scoring and majestic themes not only elevated the military band’s status but also bridged the gap to concert band repertoire․ Its availability in PDF format has ensured its continued performance and study, solidifying its place as a foundational work in both genres․ This duality underscores its enduring influence and relevance in modern ensembles․

7․3 Legacy in Contemporary Performances

Gustav Holst’s First Suite in E Flat remains a cornerstone in contemporary performances, with its PDF availability ensuring widespread accessibility․ Its influence on 20th-century band music is evident in modern ensembles’ interpretations․ The suite’s versatility allows it to resonate with diverse audiences, from military bands to concert halls․ Contemporary performances often highlight its enduring appeal, blending traditional orchestration with innovative arrangements․ This legacy ensures the suite’s continued relevance, solidifying its place as a timeless masterpiece in wind band literature․

Gustav Holst’s First Suite in E Flat stands as a seminal work in wind band literature, blending rich history, masterful composition, and enduring relevance․ Its accessibility in PDF format ensures its continued performance and study, cementing its legacy as a cornerstone of classical music for future generations․

8․1 Summary of Key Points

Gustav Holst’s First Suite in E Flat is a landmark composition for military band, showcasing three distinct movements: Chaconne, Intermezzo, and March․ Composed in 1909 and published in 1917, it highlights Holst’s innovative orchestration and melodic craftsmanship․ The suite is widely available in PDF format, making it accessible for study and performance․ Its historical significance, coupled with its enduring popularity, solidifies its place as a foundational work in wind band repertoire, influencing generations of composers and remaining a staple in modern performances․

8․2 Final Thoughts on the Suite’s Significance

Gustav Holst’s First Suite in E Flat stands as a seminal work in wind band literature, blending tradition with innovation; Its enduring appeal lies in its masterful orchestration, memorable melodies, and structural complexity․ The suite’s availability in PDF format has ensured its accessibility, fostering both performance and study․ As a cornerstone of military band repertoire, it continues to inspire musicians and composers, bridging the gap between early 20th-century traditions and modern musical interpretation․ Its legacy endures, cementing its importance in the evolution of concert band music․

mechanical aptitude test questions and answers pdf

Mechanical Aptitude Test Questions and Answers PDF: A Comprehensive Guide

Are you preparing for a mechanical aptitude test? This comprehensive guide will provide you with an overview of what to expect, including common topics, sample questions, and tips for success. Understanding these tests is crucial for various career paths, so let’s equip you with the knowledge you need!

What is a Mechanical Aptitude Test?

A mechanical aptitude test, also known as a mechanical reasoning test, is designed to evaluate your understanding of mechanical principles and your ability to apply them to practical situations. These tests assess your potential to learn and perform tasks related to mechanics and machinery. They are commonly used as pre-employment assessments in industries like manufacturing, construction, and engineering;

The questions typically involve diagrams or scenarios that require you to understand concepts such as basic physical forces, levers, pulleys, gears, springs, inclined planes, hydraulic systems, and electrical circuits. The goal is to determine how well you can interpret mechanical systems and apply principles of physics like force, motion, energy, and pressure to solve problems. Success in these tests can demonstrate your suitability for roles requiring mechanical knowledge and problem-solving skills. Practicing with sample questions is essential to improve your speed and accuracy;

Common Topics Covered in Mechanical Aptitude Tests

Mechanical aptitude tests typically cover a range of topics related to mechanics and physics. These topics are designed to assess your understanding of fundamental principles and how they apply to real-world situations. Common areas include basic physical forces like gravity, friction, velocity, and acceleration. You’ll also encounter questions on levers, pulleys, and gears, requiring you to understand how these simple machines work and their mechanical advantages;

Springs and inclined planes are also frequently tested, assessing your knowledge of how they store and transfer energy. Hydraulic systems and pressure transmission are other common areas, focusing on how fluids are used to generate force. Furthermore, electrical circuits, including voltage, current, and resistance, are often included to evaluate your understanding of basic electrical concepts. Familiarity with tools, shop knowledge, spatial reasoning, and shop arithmetic can also be beneficial. Mastering these topics is crucial for achieving a high score on mechanical aptitude tests.

Basic Physical Forces

Understanding basic physical forces is essential for success on mechanical aptitude tests. These forces are the foundation of how machines and mechanical systems operate. Gravity, the force that attracts objects with mass towards each other, is a fundamental concept. Questions may involve calculating the force of gravity or understanding its effects on objects in motion.

Friction, the force that opposes motion between surfaces in contact, is another key area. Understanding static and kinetic friction, as well as factors that affect friction, is important. Velocity and acceleration describe the motion of objects. You should be able to calculate these values and understand their relationship. Heat, a form of energy, and its transfer through conduction are also relevant. Understanding how heat affects materials and systems is crucial. Finally, pressure, the force exerted per unit area, is important for understanding fluid mechanics and hydraulic systems. Mastering these basic physical forces will greatly improve your performance on the test.

Levers, Pulleys, and Gears

Levers, pulleys, and gears are fundamental mechanical components frequently tested on mechanical aptitude assessments. Levers are simple machines that amplify force, consisting of a fulcrum, load, and effort. Understanding the relationship between these components and calculating mechanical advantage is crucial. Pulleys are used to lift heavy objects by changing the direction of force or providing mechanical advantage. You’ll need to analyze pulley systems to determine the force required to lift a load.

Gears are rotating machine parts with teeth that mesh to transmit torque. Understanding gear ratios, speed, and direction of rotation is essential. Questions often involve determining the output speed or torque given the input values and gear configurations. You might encounter scenarios involving simple, compound, or even more complex gear systems. Being able to visualize how these components interact and apply basic formulas will significantly improve your chances of answering correctly and quickly. Mastering these concepts is key to excelling in mechanical aptitude tests.

Springs and Inclined Planes

Springs and inclined planes are essential topics covered in mechanical aptitude tests. Understanding how they work and their related principles is crucial for success. Springs store mechanical energy when compressed or stretched, and the force they exert is proportional to their displacement, described by Hooke’s Law. Questions may involve calculating the force required to compress a spring a certain distance or determining the potential energy stored within it. You’ll need to apply formulas and understand the relationship between force, displacement, and spring constant.

Inclined planes, also known as ramps, reduce the force required to move an object vertically by increasing the distance over which the force is applied. They demonstrate the concept of mechanical advantage. Problems often involve calculating the force needed to push an object up an inclined plane, considering factors like friction and the angle of inclination. A solid understanding of trigonometry and force vectors is beneficial for solving these types of questions. Practice with various scenarios involving different angles and coefficients of friction to master these concepts and improve your test performance.

Hydraulic Systems and Pressure Transmission

Hydraulic systems and pressure transmission are vital components of mechanical aptitude tests, focusing on the principles of fluid mechanics. These systems use incompressible fluids, typically oil, to transmit force and power. A key concept is Pascal’s Law, which states that pressure applied to a confined fluid is transmitted equally in all directions throughout the fluid. This principle allows hydraulic systems to multiply force, enabling them to perform tasks that would be impossible with purely mechanical means.

Test questions often involve scenarios with pistons and cylinders of different sizes. You might be asked to calculate the force exerted by a larger piston given the force applied to a smaller piston, or to determine the pressure within the system. Understanding the relationship between force, pressure, and area is crucial. Additionally, questions may explore the effects of fluid viscosity and flow rate on system performance. Practice applying Pascal’s Law and related formulas to various hydraulic system configurations to enhance your problem-solving skills and boost your confidence on the mechanical aptitude test. Familiarity with hydraulic components such as pumps, valves, and actuators is also beneficial.

Electrical Circuits (Voltage, Current, Resistance)

Understanding basic electrical circuits is essential for mechanical aptitude tests. Questions in this section focus on the fundamental relationship between voltage, current, and resistance, as defined by Ohm’s Law (V = IR). Voltage (V) represents the electrical potential difference, current (I) measures the flow of electrical charge, and resistance (R) opposes this flow. You’ll need to be able to apply Ohm’s Law to solve problems involving series and parallel circuits.

In series circuits, the current is the same through all components, while the voltage is divided. In parallel circuits, the voltage is the same across all components, but the current is divided. Questions may involve calculating the total resistance, current, or voltage in various circuit configurations. Familiarity with circuit diagrams and the symbols for resistors, batteries, and switches is also crucial. Additionally, questions may explore the concepts of power (P = VI) and energy consumption. Practice solving a variety of circuit problems to develop your skills and improve your speed and accuracy on the test. Also, understanding the function of a switch in a circuit and how it affects the flow of electricity is very important.

Popular Mechanical Aptitude Tests

Several standardized mechanical aptitude tests are widely used by employers to assess candidates’ mechanical reasoning abilities. These tests evaluate your understanding of mechanical principles and your ability to apply them to solve practical problems. Two prominent examples are the Wiesen Test of Mechanical Aptitude (WTMA) and the Ramsay Mechanical Aptitude Test (Ramsay MAT).

The WTMA, often used in industries like construction and manufacturing, consists of 55 questions to be completed in 25 minutes. It covers topics such as basic machinery concepts, object movement, gravity, and heat conduction. The Ramsay MAT, frequently used in manufacturing and transportation, features 36 multiple-choice questions with a 20-minute time limit. Another notable test is the Armed Services Vocational Aptitude Battery (ASVAB), used by the U.S. military. Each test has a different format, time constraint, and question type; therefore, it is important to familiarize yourself with the specific test you will be taking. Practicing sample questions from these popular tests can significantly improve your performance and increase your chances of success.

Wiesen Test of Mechanical Aptitude (WTMA)

The Wiesen Test of Mechanical Aptitude, commonly known as the WTMA, is a widely used assessment tool designed to evaluate an individual’s mechanical reasoning and spatial visualization skills. This test is frequently employed across various industries, including construction, manufacturing, and engineering, as well as in academic research settings. The WTMA assesses a candidate’s ability to comprehend mechanical principles and apply them to practical situations.

The WTMA typically consists of 55 multiple-choice questions that must be answered within a 25-minute time limit. The questions cover a range of topics, including basic machinery concepts, the movement of objects, gravity and center of gravity, and heat conduction. Successful performance on the WTMA requires a strong understanding of fundamental physics principles and the ability to visualize mechanical systems. Preparing for the WTMA often involves practicing sample questions, reviewing relevant mechanical concepts, and developing effective time-management skills. A high score on the WTMA can significantly enhance a candidate’s prospects in mechanically oriented roles.

Ramsay Mechanical Aptitude Test (Ramsay MAT)

The Ramsay Mechanical Aptitude Test (Ramsay MAT) is a pre-employment screening tool used in various industries, especially manufacturing, transportation, and construction. It assesses a candidate’s mechanical aptitude, measuring their ability to understand and apply mechanical principles. The Ramsay MAT is designed to predict job performance in roles requiring mechanical knowledge and skills.

The Ramsay MAT typically consists of 36 multiple-choice questions, which must be answered within a strict 20-minute time limit. The test evaluates a range of mechanical concepts, including but not limited to force, motion, energy, and simple machines. Candidates need to demonstrate a grasp of basic physics and the ability to interpret mechanical systems to succeed. Preparation often involves reviewing fundamental mechanical principles, practicing sample questions under timed conditions, and developing effective test-taking strategies. A strong performance on the Ramsay MAT demonstrates a candidate’s potential to learn and perform tasks related to mechanics and machinery, making it a valuable asset in securing relevant employment opportunities.

first aid pdf book

First Aid PDF Book: A Comprehensive Guide

Navigating emergencies requires quick access to reliable information. This comprehensive guide offers essential first aid knowledge in a convenient PDF format. From basic principles to specific treatments, this resource empowers individuals to respond effectively in critical situations, potentially saving lives and minimizing harm until professional help arrives.

First aid embodies the immediate assistance provided to an injured or ill person before professional medical help arrives. It’s the initial care, often life-saving, delivered at the scene of an accident or medical emergency. First aid encompasses a range of actions, from managing minor injuries like cuts and bruises to addressing life-threatening situations such as cardiac arrest or severe bleeding.

The primary goals of first aid are to preserve life, prevent further harm, and promote recovery. It involves assessing the situation, providing necessary interventions, and ensuring the safety of both the victim and the first aider. Knowledge of basic first aid principles equips individuals with the confidence and skills to respond effectively in emergencies, potentially making a significant difference in the outcome. First aid is not a substitute for professional medical care, but it serves as a crucial bridge until qualified medical personnel can take over. Mastering first aid empowers individuals to become valuable assets in their communities, ready to assist those in need during times of crisis.

Importance of First Aid Knowledge

Possessing first aid knowledge is invaluable, empowering individuals to act decisively in emergencies. It equips people with the skills to provide immediate care, potentially saving lives and minimizing the severity of injuries. First aid knowledge fosters confidence, enabling individuals to remain calm and composed in stressful situations. This composure is crucial for assessing the situation accurately and providing effective assistance.

Furthermore, first aid skills can prevent further harm, ensuring the safety of both the victim and the first responder. By understanding basic principles, individuals can stabilize injuries, control bleeding, and maintain airways until professional help arrives. First aid knowledge is not only beneficial in emergency situations but also in everyday life. It allows individuals to manage minor injuries at home or work, promoting faster recovery and reducing the need for medical intervention. Ultimately, first aid knowledge is a life skill that empowers individuals to make a positive impact in their communities, becoming valuable assets during times of crisis. It contributes to a safer and more prepared society.

Essential First Aid Kit Contents

A well-stocked first aid kit is a crucial resource for addressing injuries and emergencies. Essential items include various bandages, such as adhesive bandages in assorted sizes, sterile gauze pads, and elastic bandages for sprains. Antiseptic wipes or solutions are vital for cleaning wounds and preventing infection. Medical tape is necessary for securing bandages and dressings. A pair of sharp scissors is essential for cutting bandages and clothing. Tweezers are helpful for removing splinters or debris from wounds.

Pain relievers, like ibuprofen or acetaminophen, can alleviate discomfort. Antihistamine tablets or cream can relieve allergic reactions or insect bites. Burn cream is crucial for treating minor burns. A CPR face shield is important for performing rescue breathing safely. A first aid manual provides guidance on how to use the kit’s contents effectively. A thermometer helps monitor body temperature. Non-latex gloves protect both the first aider and the injured person from contamination. Regularly check and replenish the kit to ensure all items are within their expiration dates and readily available when needed.

Basic First Aid Principles (DRSABCD)

The DRSABCD action plan is a systematic approach to managing emergencies and providing first aid effectively. “D” stands for Danger, emphasizing the need to assess the surrounding area for any potential hazards to yourself, the casualty, and bystanders. Ensure the scene is safe before approaching. “R” represents Response, where you check for a response from the casualty by gently shaking their shoulders and asking loudly, “Are you okay?” If there is no response, proceed to the next step. “S” signifies Send for help, instructing someone to call emergency services (e.g., 911) or delegate this task while you continue providing assistance.

“A” denotes Airway, focusing on ensuring a clear and open airway for the casualty. Tilt the head back and lift the chin to open the airway. “B” stands for Breathing, where you check for normal breathing by observing chest movement, listening for breath sounds, and feeling for air on your cheek. If the casualty is not breathing or not breathing normally, begin rescue breathing. “C” represents CPR (Cardiopulmonary Resuscitation), involving chest compressions and rescue breaths to circulate blood and oxygen. “D” is for Defibrillation, using an AED (Automated External Defibrillator) if available, to deliver an electrical shock if needed.

Managing Common Injuries

Effectively managing common injuries is a crucial aspect of first aid, requiring a calm and methodical approach. Minor cuts and abrasions should be cleaned thoroughly with soap and water to prevent infection. Apply a sterile bandage to protect the wound and promote healing. For sprains and strains, remember the acronym RICE: Rest, Ice, Compression, and Elevation. Rest the injured limb, apply ice packs to reduce swelling, use a compression bandage for support, and elevate the limb above the heart.

Nosebleeds can be managed by having the person lean forward and pinch the soft part of their nose for 10-15 minutes. If bleeding persists, seek medical attention. Burns should be cooled immediately with cool running water for at least 20 minutes. Cover the burn with a sterile dressing. For minor head injuries, monitor for signs of concussion, such as headache, dizziness, or confusion. Seek medical evaluation if symptoms worsen or persist. Insect stings can be treated by removing the stinger (if present) and applying a cold compress to reduce swelling and pain.

Wound Care and Bandaging Techniques

Proper wound care and bandaging techniques are essential for preventing infection and promoting healing. Before treating any wound, wash your hands thoroughly with soap and water or use hand sanitizer. Control bleeding by applying direct pressure to the wound with a clean cloth. Once bleeding is controlled, clean the wound gently with mild soap and water, removing any debris.

For minor cuts and abrasions, apply a thin layer of antibiotic ointment and cover with a sterile bandage. Change the bandage daily, or more often if it becomes wet or soiled. For larger wounds, consider using different types of bandages depending on the location and severity. Triangular bandages can be used to create slings for arm injuries or to secure dressings. Elastic bandages provide compression and support for sprains and strains. Adhesive bandages are suitable for small wounds. When applying a bandage, ensure it is snug but not too tight to avoid cutting off circulation. Monitor the wound for signs of infection, such as increased pain, redness, swelling, or pus.

Treatment of Burns

Treating burns effectively is crucial to minimize tissue damage and prevent complications. The first step is to stop the burning process by removing the heat source. For thermal burns, immediately cool the burn area with cool (not cold) running water for at least 10-20 minutes. This helps to reduce the temperature of the skin and underlying tissues; Do not use ice, as it can cause further damage.

For chemical burns, flush the affected area with large amounts of water for at least 20 minutes, ensuring the chemical is thoroughly removed. For electrical burns, ensure the power source is disconnected before approaching the victim. Once the burn is cooled, cover it with a sterile, non-adhesive dressing. Do not apply ointments, creams, or butter, as these can trap heat and increase the risk of infection. Elevate the burned area if possible, and monitor for signs of shock. Seek immediate medical attention for severe burns, burns covering a large area, burns on the face, hands, feet, or genitals, or burns that involve difficulty breathing.

Fractures and Sprains Management

Managing fractures and sprains effectively is crucial to prevent further injury and promote healing. The initial approach follows the principles of RICE: Rest, Ice, Compression, and Elevation. Rest involves immobilizing the injured limb to prevent further movement and damage. Apply ice packs to the injured area for 20 minutes at a time, several times a day, to reduce swelling and pain. Ensure a barrier, such as a cloth, is between the ice and skin to prevent frostbite.

Compression involves applying a snug but not too tight bandage to the injured area to help control swelling. Elevate the injured limb above the heart to further reduce swelling. If a fracture is suspected, immobilize the limb with a splint to prevent movement and potential displacement of the bone fragments. Use readily available materials such as cardboard or rolled-up magazines to create a temporary splint. Secure the splint with bandages or tape, ensuring it is not too tight to cut off circulation. Monitor for signs of compromised circulation, such as numbness, tingling, or discoloration. Seek immediate medical attention for suspected fractures, especially if there is an open wound, deformity, or severe pain.

CPR and AED Usage

Cardiopulmonary Resuscitation (CPR) and Automated External Defibrillator (AED) usage are life-saving skills vital in cases of sudden cardiac arrest. CPR involves chest compressions and rescue breaths to maintain blood flow and oxygen to the brain until advanced medical help arrives. Begin by ensuring the scene is safe. Check for responsiveness by tapping the person and shouting. If there is no response, call emergency services immediately. If you are alone, use your mobile device with speaker, and then begin CPR.

Place the person on their back on a firm surface. Position your hands in the center of the chest, one hand on top of the other, and deliver compressions at a rate of 100-120 per minute, pushing down about 2 inches. After 30 compressions, give two rescue breaths. Tilt the head back, lift the chin, and pinch the nose closed. Seal your mouth over the person’s mouth and give two breaths, each lasting about one second. Continue chest compressions and rescue breaths until help arrives or the person shows signs of life.

An AED is a device that delivers an electrical shock to restore a normal heart rhythm. Turn on the AED and follow the voice prompts. Attach the AED pads to the person’s chest as indicated on the pads. Ensure no one is touching the person while the AED analyzes the heart rhythm and, if prompted, deliver a shock. Continue CPR until help arrives, even after delivering a shock.

First Aid for Specific Conditions

Certain medical conditions require specific first aid interventions to stabilize the patient until professional help arrives. For a diabetic emergency, if the person is conscious and able to swallow, provide a sugary drink or snack to raise their blood sugar levels. If they are unconscious, do not give anything by mouth and call for emergency medical assistance immediately.

In the event of a seizure, protect the person from injury by clearing the area of any hazards and placing something soft under their head. Do not restrain the person or put anything in their mouth. Monitor their breathing and be prepared to turn them onto their side if they vomit. Call for emergency assistance if the seizure lasts longer than five minutes or if the person has repeated seizures.

For someone experiencing a stroke, remember the acronym FAST: Face drooping, Arm weakness, Speech difficulty, and Time to call emergency services. Note the time when symptoms started, as this information is crucial for medical professionals. Keep the person calm and comfortable, and monitor their breathing. Do not give them anything to eat or drink. Prompt action can significantly improve the outcome of a stroke.

Anaphylaxis First Aid

Anaphylaxis is a severe, potentially life-threatening allergic reaction that requires immediate first aid intervention. Recognizing the signs and symptoms is crucial for prompt treatment. These may include difficulty breathing, wheezing, throat swelling, hives, itching, a drop in blood pressure, dizziness, and loss of consciousness. The most important first aid measure for anaphylaxis is the administration of epinephrine using an auto-injector (EpiPen).

If the person experiencing anaphylaxis has an EpiPen, assist them in using it according to the manufacturer’s instructions. Inject the epinephrine into the outer thigh, holding the injector in place for the recommended duration. Call emergency medical services immediately after administering epinephrine, even if the symptoms appear to improve. Anaphylaxis can be biphasic, meaning that symptoms can return hours later.

While waiting for emergency medical assistance, keep the person lying down with their legs elevated, unless they are having difficulty breathing, in which case, allow them to sit up. Monitor their breathing and be prepared to perform CPR if necessary. Ensure that the person avoids further exposure to the allergen that triggered the reaction. Anaphylaxis is a medical emergency that demands rapid and effective first aid.

First Aid Training and Certification

Acquiring formal first aid training and certification is highly recommended to enhance your ability to respond effectively in emergency situations. Reputable organizations like the American Red Cross, St. John Ambulance, and the American Heart Association offer comprehensive courses that cover a wide range of first aid skills and knowledge. These courses typically include hands-on practice, allowing participants to develop confidence and competence in performing essential first aid procedures.

Certification in first aid demonstrates that you have met specific standards of knowledge and skill, and it is often required for certain professions, such as lifeguards, teachers, and childcare providers. First aid certifications are typically valid for a specific period, usually two years, after which recertification is necessary to ensure that your knowledge and skills remain current.

Investing in first aid training and certification is an investment in your ability to help others and potentially save lives. Consider enrolling in a course to gain the knowledge and skills needed to respond confidently and effectively in a variety of emergency situations. Remember, proper training can make a significant difference in the outcome of an injury or illness.

Workplace First Aid Programs and OSHA Compliance

Establishing comprehensive workplace first aid programs is crucial for ensuring employee safety and complying with Occupational Safety and Health Administration (OSHA) regulations. OSHA mandates that employers provide adequate first aid resources, including trained personnel and readily accessible first aid supplies, to address injuries and illnesses that may occur in the workplace. A well-designed first aid program aims to minimize the impact of accidents and exposures by providing immediate care until professional medical assistance arrives.

OSHA compliance involves several key elements, such as conducting a hazard assessment to identify potential workplace risks, developing a written first aid plan, providing appropriate first aid training to designated employees, and maintaining a well-stocked first aid kit that is regularly inspected and replenished. The specific requirements for first aid programs may vary depending on the nature of the workplace and the types of hazards present.

Implementing a robust workplace first aid program not only fulfills legal obligations but also demonstrates a commitment to employee well-being, fostering a safer and more productive work environment. By prioritizing first aid preparedness, employers can significantly reduce the severity of workplace injuries and illnesses, ultimately protecting their most valuable asset: their employees.

dorel home products bunk bed instructions

The Dorel Home Products bunk bed instructions provide a guide for assembling and using the bunk bed safely and correctly, including important safety guidelines and features information always online.

Overview of Assembly Instructions

The assembly instructions for Dorel Home Products bunk beds are detailed and easy to follow, providing a step-by-step guide for assembling the bed. The instructions include information on the tools required, the parts included, and the assembly process. The instructions are available online and can be downloaded and printed for convenience. The assembly process typically begins with the headboard and footboard, followed by the frame and ladder. The instructions also include information on how to attach the guardrails and other safety features. By following the assembly instructions carefully, consumers can ensure that their bunk bed is assembled correctly and safely. The instructions are an essential part of the assembly process and should be followed carefully to avoid any mistakes or injuries. The assembly instructions are also available in different languages, making it easier for consumers to understand and follow the instructions.

Understanding Safety Guidelines

Safety guidelines are crucial for preventing injuries and ensuring proper use of Dorel Home Products bunk beds always online with important information and features available.

Age Restrictions and Guardrail Usage

According to the instructions, children under 6 years of age should not be allowed to use the upper bunk, and guardrails should always be used on both long sides of the upper bunk. This is a crucial safety precaution to prevent accidents and injuries. The guardrail that runs the full length of the bed should be placed against the wall to prevent entrapment between the bed and wall. It is essential to follow these guidelines to ensure the safe use of the bunk bed. The instructions also provide guidance on how to properly assemble and install the guardrails to ensure they are secure and effective. By following these guidelines, users can help prevent accidents and ensure a safe and enjoyable sleeping experience for children using the bunk bed. Proper usage and assembly are critical for safety.

Assembly Process for Dorel Home Products Bunk Bed

Assembly requires careful attention to instructions and safety guidelines always online for correct assembly process information.

Step-by-Step Assembly Instructions

The assembly instructions for Dorel Home Products bunk bed are provided in a detailed manual that can be downloaded online. The manual includes a step-by-step guide on how to assemble the bunk bed, including the installation of the headboard, footboard, and ladder. It also provides information on how to attach the guardrails and ensure that the bunk bed is stable and secure. The instructions are easy to follow and include diagrams and illustrations to help with the assembly process. It is important to read the instructions carefully and follow them exactly to ensure that the bunk bed is assembled correctly and safely. The manual also includes a list of tools and materials needed for the assembly, as well as tips and precautions to avoid any injuries or damage to the bunk bed. By following the step-by-step assembly instructions, you can ensure that your Dorel Home Products bunk bed is assembled quickly and easily.

Conversion Options for Dorel Home Products Bunk Bed

Dorel Home Products bunk bed offers conversion options for different configurations and uses always easily online.

Converting the Bunk Bed to Different Configurations

The Dorel Home Products bunk bed can be converted to different configurations, such as a twin-over-full bunk bed or a loft bed, with the use of conversion kits and hardware. The conversion process typically involves removing the existing bed frame and replacing it with the new configuration. It is essential to follow the manufacturer’s instructions for conversion to ensure safety and stability. The conversion kits and hardware can be purchased separately, and it is recommended to consult the manufacturer’s website or customer support for guidance on the conversion process. Additionally, the conversion process may require additional tools and materials, such as a drill and screws, and it is crucial to follow the manufacturer’s instructions for assembly and installation. The conversion options provide flexibility and versatility, allowing the bunk bed to adapt to changing needs and preferences. The process can be completed with basic DIY skills and tools.

Troubleshooting Common Issues with Dorel Home Products Bunk Bed

Resolving issues with Dorel Home Products bunk bed requires checking assembly and safety guidelines always online for solutions and guidance.

Resolving Assembly and Safety Concerns

To resolve assembly and safety concerns with Dorel Home Products bunk bed, it is essential to carefully review the assembly instructions and safety guidelines provided. The instructions outline the step-by-step process for assembling the bunk bed, including the installation of guardrails and the attachment of the ladder. Additionally, the safety guidelines provide important information on the proper use and maintenance of the bunk bed, including weight limits and age restrictions. By following these guidelines, consumers can ensure that their bunk bed is assembled and used safely, reducing the risk of injury or accident. The manufacturer’s website also provides a resource for troubleshooting common issues and resolving assembly and safety concerns, offering a comprehensive guide to help consumers address any problems that may arise. This information is readily available online, making it easily accessible to consumers.

Importance of Following Dorel Home Products Bunk Bed Instructions

Following instructions ensures safe and proper assembly of the bunk bed, preventing accidents and injuries to children, using online resources and guides always available.

Ensuring Safe and Proper Assembly

To ensure safe and proper assembly of the Dorel Home Products bunk bed, it is essential to follow the instructions carefully and thoroughly, using online resources and guides as needed. The instructions provide a step-by-step guide on how to assemble the bunk bed, including the installation of guardrails and other safety features. By following the instructions, individuals can prevent accidents and injuries to children, and ensure that the bunk bed is assembled correctly and securely. The instructions also provide information on the weight limit of the bunk bed and the importance of regular maintenance and inspection to ensure the bunk bed remains safe and sturdy. Additionally, the instructions may include warnings and precautions to take when assembling and using the bunk bed, such as ensuring the bunk bed is placed on a firm and level surface. Proper assembly is crucial.

a woman’s way through the 12 steps pdf

Overview of the Book

A Woman’s Way Through the 12 Steps provides a comprehensive guide for women in recovery‚ focusing on the unique aspects of their journey. The book‚ written by Stephanie Covington‚ is designed to help women understand and work through the 12-step program in a way that is tailored to their specific needs and experiences. The online pdf version of the book offers a convenient and accessible way for women to access the material and work through the program at their own pace. The book covers topics such as the importance of community and support‚ the role of self-care and self-compassion‚ and the need to address underlying issues and trauma. By providing a safe and supportive environment‚ the book empowers women to take ownership of their recovery and to find a path that works for them. This approach has been shown to be highly effective in helping women achieve long-term recovery.

Step 1: Understanding the First Step

Step 1 involves acknowledging powerlessness‚ a crucial step for women‚ with online pdf resources offering guidance and support for this initial stage of recovery and personal growth process.

Importance of the First Step

The first step is crucial for women in recovery‚ as it allows them to acknowledge their powerlessness and take the initial step towards healing and growth.

Online resources‚ such as pdf guides‚ provide valuable support and guidance for this stage‚ helping women to understand the importance of this step.

By working through the first step‚ women can begin to develop a deeper understanding of their addiction and the impact it has had on their lives‚ and start to build a strong foundation for their recovery journey‚ with the help of online pdf materials and resources.

Step 2-12: Working Through the Remaining Steps

Steps 2-12 provide a framework for women to work through their recovery‚ with online pdf resources offering guidance and support for each step of the journey towards healing.

Applying the Steps to Women’s Lives

Applying the 12 steps to women’s lives requires a thoughtful and nuanced approach‚ taking into account the unique challenges and experiences that women face in recovery.

Online resources‚ such as pdf guides‚ can provide valuable support and guidance for women working through the steps.

By applying the principles of the 12 steps in a way that is sensitive to women’s needs‚ women can find a path towards healing and recovery that is authentic and empowering‚ with the help of online pdf resources and guides.

A Woman’s Way Through the 12 Steps Workbook offers practical exercises and guidance for women in recovery‚ available as a downloadable pdf resource online for easy access always.

Practical Exercises for Recovery

The workbook provides a range of practical exercises to help women work through the 12 steps‚ including writing prompts‚ reflection questions‚ and action plans. These exercises are designed to be completed at the reader’s own pace‚ allowing them to reflect on their experiences and thoughts in a safe and supportive environment. The exercises are also tailored to address the unique challenges and concerns that women may face in recovery‚ such as relationships‚ self-care‚ and emotional healing. By working through these exercises‚ women can develop a deeper understanding of themselves and their recovery journey‚ and can identify areas where they need to focus their efforts. The practical exercises for recovery are an essential component of the workbook‚ and are available for download as a pdf resource online. They offer a valuable tool for women seeking to overcome addiction and achieve long-term recovery.

Unique Challenges Women Face in Recovery

Women in recovery face unique challenges‚ including societal pressures‚ relationships‚ and emotional struggles‚ requiring specialized support and resources‚ like A Woman’s Way Through the 12 Steps pdf online.

Addressing Women’s Specific Needs

Addressing women’s specific needs in recovery is crucial for their success and well-being. The traditional 12-step program can be adapted to meet the unique challenges and experiences of women‚ as outlined in A Woman’s Way Through the 12 Steps pdf. This approach recognizes that women’s recovery can döffer from men’s and provides guidance on how to navigate the 12 steps in a way that is relevant and effective for women. By acknowledging and addressing the specific needs and concerns of women‚ this approach can help them to overcome the obstacles that may hinder their recovery and achieve long-term sobriety and personal growth. The resources and support provided can be accessed online‚ making it easier for women to find the help they need and start their journey towards recovery. Women can find empowerment and healing through this approach.

summarizes the importance of A Woman’s Way Through the 12 Steps pdf in empowering women to overcome addiction and achieve recovery with online resources and support available always.

Empowering Women in Recovery

Empowering women in recovery is a crucial aspect of the program‚ as it provides them with the tools and support necessary to overcome addiction and achieve long-term sobriety. The pdf resources available online offer a comprehensive guide to the 12-step program‚ tailored specifically to the needs of women. By focusing on the unique challenges and experiences of women‚ the program aims to create a sense of community and connection among participants. This sense of belonging is essential for women in recovery‚ as it provides them with a support network and a safe space to share their struggles and successes. The program’s emphasis on empowerment also encourages women to take an active role in their recovery‚ making informed decisions and taking control of their lives. Overall‚ the program’s approach to empowering women in recovery has been shown to be highly effective‚ with many participants achieving lasting sobriety and improved overall well-being.

2014 electrical code pdf

The 2014 electrical code pdf is a comprehensive guide

Overview of the National Electrical Code

The National Electrical Code is a standard for electrical wiring and equipment in the United States.
The code is published by the National Fire Protection Association and is updated every three years.
It provides rules and guidelines for the safe installation of electrical systems.
The code is adopted by states and local jurisdictions and is used by electricians, engineers, and architects.
It covers a wide range of topics, including electrical circuits, wiring methods, and equipment installation.
The code is an important tool for ensuring public safety and preventing electrical fires and accidents.
It is widely used and respected in the electrical industry.
The code is also used as a reference guide for electrical inspections and enforcement.
It provides a framework for electrical safety and is an essential resource for anyone working with electrical systems.

Importance of the 2014 Electrical Code PDF

The 2014 Electrical Code PDF is crucial for ensuring electrical safety and compliance with national standards.
It provides a comprehensive guide for electricians, engineers, and architects to follow.
The code is essential for preventing electrical fires and accidents, and for protecting people and property.
It is also important for ensuring that electrical systems are installed and maintained correctly.
The 2014 Electrical Code PDF is a valuable resource for anyone working with electrical systems, including homeowners and businesses.
It helps to ensure that electrical work is done safely and efficiently, and that it meets national standards.
The code is widely adopted and respected, and it is an important tool for promoting electrical safety and compliance.
It is used by electrical inspectors and enforcement agencies to ensure that electrical systems are installed and maintained correctly.
The code is an essential resource for promoting public safety and preventing electrical accidents.

History of the National Electrical Code

National Electrical Code originated from efforts to standardize electrical safety

Development of the 2014 Edition

The development of the 2014 edition involved a thorough review of the previous edition, with input from various stakeholders, including electricians, engineers, and safety experts. The National Electrical Code (NEC) is developed by the National Fire Protection Association (NFPA) and is revised every three years to reflect changes in technology and safety standards. The 2014 edition was published in 2013 and became effective in 2014. It includes new articles, revisions to existing articles, and updates to tables and figures. The development process involved a series of meetings, hearings, and comment periods to ensure that the code reflects the needs of the electrical industry and promotes electrical safety. The result is a comprehensive guide that provides clear and consistent requirements for electrical installations. The 2014 edition is an important resource for anyone involved in electrical work.

Key Contributors to the 2014 Edition

Several key contributors played a crucial role in the development of the 2014 edition, including Mike Holt, a renowned expert in electrical power installations. Other contributors included members of the National Fire Protection Association (NFPA) and the National Electrical Code (NEC) committee. These individuals brought their expertise and experience to the table, ensuring that the code reflects the latest advancements in electrical technology and safety standards. The contributions of these individuals helped shape the 2014 edition into a comprehensive and authoritative guide for electrical installations. Their input and feedback were invaluable in creating a code that promotes electrical safety and consistency. The key contributors’ work on the 2014 edition has had a lasting impact on the electrical industry, and their contributions continue to be recognized and respected. The 2014 edition is a testament to their dedication and expertise.

Contents of the 2014 Electrical Code PDF

The code includes various articles and sections for safe installations and usage guidelines always

Article 210: Branch Circuits

Article 210 of the 2014 electrical code pdf provides guidelines for branch circuits, including requirements for circuit ratings, overcurrent protection, and grounding. The article outlines the minimum ampacity of branch circuits and the maximum loading of branch circuits. It also covers the requirements for arc-fault circuit-interrupter protection and ground-fault circuit-interrupter protection for personnel. Additionally, the article provides tables and figures to help with the calculation of branch circuit loads and the selection of overcurrent devices. The requirements in Article 210 are designed to ensure the safe installation and operation of branch circuits in residential, commercial, and industrial settings. By following the guidelines in this article, electricians and electrical inspectors can help prevent electrical hazards and ensure compliance with the National Electrical Code. The article is an essential resource for anyone involved in electrical installations.

Article 220: Load Calculations

Article 220 of the 2014 electrical code pdf focuses on load calculations, providing a framework for determining the total load of a building or structure. The article outlines the factors to consider when calculating loads, including the type of occupancy, the number of occupants, and the types of equipment and appliances used. It also provides formulas and tables to help with load calculations, such as the calculation of general lighting loads and appliance loads. The article requires that load calculations be performed to determine the minimum ampacity of service-entrance conductors and the rating of overcurrent devices. By following the guidelines in Article 220, electricians and electrical engineers can ensure that electrical systems are properly sized to meet the demands of the building or structure, and that the system is safe and reliable. This article is crucial for ensuring compliance with the National Electrical Code.

Changes in the 2014 Electrical Code PDF

Updated requirements and new regulations were implemented in the code

New Requirements for Receptacle Installation

The 2014 electrical code pdf introduced new requirements for receptacle installation, aiming to enhance safety and efficiency.

A new section, 210.64, mandates the installation of a receptacle within 50 feet of the electrical service area, facilitating the connection of monitoring and diagnostic equipment.

This update is crucial for electrical service areas, ensuring that cord and plug connected equipment can be safely and conveniently connected.

The new requirements also emphasize the importance of proper receptacle installation, taking into account factors such as location, accessibility, and compatibility with various types of equipment.

By adhering to these new requirements, electrical contractors and homeowners can ensure compliance with the 2014 electrical code pdf, promoting a safer and more efficient electrical infrastructure.

Overall, the updated receptacle installation requirements contribute to the overall goal of the 2014 electrical code pdf, which is to provide a comprehensive and safety-focused guide for electrical installations.

Updates to Electrical Service Areas

The 2014 electrical code pdf includes updates to electrical service areas, focusing on safety and efficiency.

These updates aim to provide clearer guidelines for electrical service area installations, ensuring compliance with the latest safety standards.

Electrical service areas are critical components of electrical infrastructure, and the updates in the 2014 electrical code pdf reflect the latest best practices and technological advancements.

The updates also address the installation of equipment such as monitoring and diagnostic devices, which are commonly used in electrical service areas.

By providing detailed guidelines for electrical service area installations, the 2014 electrical code pdf helps to minimize risks and ensure reliable electrical service.

Overall, the updates to electrical service areas in the 2014 electrical code pdf contribute to a safer and more efficient electrical infrastructure, supporting the needs of homes, businesses, and industries.

Resources for Understanding the 2014 Electrical Code PDF

McGraw-Hill’s handbook provides trusted advice and analysis

McGraw-Hill’s National Electrical Code 2014 Handbook

McGraw-Hill’s National Electrical Code 2014 Handbook is a comprehensive resource for understanding the 2014 electrical code pdf. This handbook provides detailed explanations and analysis of the code, making it easier to interpret and apply. The handbook is written by experts in the field and is widely recognized as a trusted authority on the subject. It includes coverage of all aspects of the code, including installation, maintenance, and safety. The handbook is an essential tool for electricians, engineers, and other professionals who work with electrical systems. It is also a valuable resource for students and educators who are studying electrical engineering and related fields. By using this handbook, individuals can gain a deeper understanding of the 2014 electrical code pdf and ensure that their work is safe, efficient, and compliant with industry standards. The handbook is a valuable investment for anyone working with electrical systems.

durga saptashloki in telugu pdf

The introduction to Durga Saptashloki in Telugu PDF begins with sacred texts and scriptures, including the Devi Mahatmyam, which contains 700 verses describing Goddess Durga’s power and glory always

Overview of Durga Saptashloki

Durga Saptashloki is a collection of seven powerful shlokas from the Devi Mahatmyam or Durga Saptashati, a sacred text containing 700 verses describing Devi as the primordial force behind the creation of the Universe.
These verses are dedicated to Goddess Durga and are believed to be very powerful in granting blessings and protection to those who chant them with devotion.
The Durga Saptashloki in Telugu PDF is available for download, allowing devotees to access and recite the shlokas with ease and convenience.
The text is considered a significant part of Hindu scripture and is often recited during religious ceremonies and rituals.
The Durga Saptashloki is a revered and sacred text that holds great spiritual significance and is widely revered by devotees of Goddess Durga.
It is a valuable resource for those seeking spiritual growth and enlightenment.

Significance of Durga Saptashloki in Telugu

Durga Saptashloki in Telugu holds great spiritual significance and power always bringing peace

Importance of Chanting Durga Saptashloki

The importance of chanting Durga Saptashloki lies in its ability to bring peace and prosperity to those who recite it with devotion. Chanting Durga Saptashloki is believed to have a profound impact on one’s life, helping to overcome obstacles and challenges. The seven shlokas are said to have the power to grant blessings and protection to those who chant them with faith and sincerity. By chanting Durga Saptashloki, individuals can experience a sense of calm and tranquility, and can also gain a deeper understanding of the divine. The chanting of Durga Saptashloki is considered a sacred practice, and is often performed during times of difficulty or hardship. Overall, the importance of chanting Durga Saptashloki cannot be overstated, as it has the power to transform lives and bring about positive change. Regular chanting is highly recommended for spiritual growth and development.

Understanding the Meaning of Durga Saptashloki

Understanding Durga Saptashloki requires knowledge of Sanskrit and Telugu languages always to grasp its spiritual significance and meaning fully and correctly every time

Breakdown of the Seven Shlokas

The breakdown of the seven shlokas in Durga Saptashloki in Telugu PDF reveals the significance of each verse in praising Goddess Durga’s power and glory.
The shlokas are taken from the Devi Mahatmyam, a sacred text containing 700 verses describing Devi as the primordial force behind the creation of the Universe.
Each shloka has its own unique meaning and significance, and together they form a powerful prayer that is believed to grant blessings and protection to those who chant it with devotion.
The seven shlokas are a collection of powerful verses that are dedicated to Goddess Durga and are believed to be very effective in granting blessings and protection.
The breakdown of the seven shlokas provides a deeper understanding of the spiritual significance of Durga Saptashloki and its importance in Hindu mythology and scripture.
The shlokas are written in Sanskrit and Telugu languages, and their meaning and significance are explained in detail in the PDF version of Durga Saptashloki.

Benefits of Reading Durga Saptashloki in Telugu

Reading Durga Saptashloki in Telugu brings spiritual growth and peace always with devotion and faith in Goddess Durga’s power

How to Download Durga Saptashloki in Telugu PDF

To download Durga Saptashloki in Telugu PDF, users can visit various websites that offer spiritual and devotional literature, such as Vaidika Vignanam, which provides a collection of scriptures in different languages, including Telugu. The website offers a range of PDF files, including the Sri Durga Saptashloki, which can be downloaded for free. Users can also search for other websites that offer similar downloads, such as archive.org, which has a vast collection of spiritual texts, including the Durga Saptashati. By following the download instructions on these websites, users can easily access and download the Durga Saptashloki in Telugu PDF, allowing them to read and chant the verses with devotion and faith in Goddess Durga’s power, and seek her blessings and protection. The download process is simple and convenient.

Collection of Spiritual and Devotional Literature

Vaidika Vignanam offers a collection of spiritual texts in Telugu and other languages always online freely available

Availability of Durga Saptashloki in Various Languages

The Durga Saptashloki is available in various languages, including Telugu, Sanskrit, Hindi, Kannada, Tamil, Malayalam, and Gujarati, making it accessible to a wide range of devotees.
The Vaidika Vignanam website offers a collection of spiritual and devotional literature in different languages, including the Durga Saptashloki.
This website provides an opportunity for devotees to download and read the Durga Saptashloki in their preferred language, allowing them to connect with the divine and seek blessings.
The availability of the Durga Saptashloki in multiple languages has helped to spread its significance and importance across different regions and cultures, promoting unity and devotion among its followers.
The Durga Saptashloki can be downloaded in PDF format from the website, making it easy to access and read on various devices, and its availability in different languages has made it a popular choice among devotees worldwide, enabling them to recite and worship with ease and convenience always.

Scriptures Related to Durga Saptashloki

Devi Mahatmyam and Durga Saptashati are sacred scriptures related to Durga Saptashloki always

Devi Mahatmyam and Durga Saptashati

The Devi Mahatmyam and Durga Saptashati are sacred scriptures that contain the essence of Goddess Durga’s power and glory, with 700 verses describing her as the primordial force behind the universe. These scriptures are considered highly revered and are often chanted by devotees to seek the blessings of Goddess Durga. The Devi Mahatmyam is a part of the Markandeya Purana, which is one of the 18 major Puranas in Hinduism. The Durga Saptashati, on the other hand, is a compilation of 700 verses from the Devi Mahatmyam, which are considered to be highly potent and effective in granting blessings and protection to those who chant them with devotion. The scriptures are available in various languages, including Telugu, and can be downloaded in PDF format for easy access and chanting. The scriptures are a testament to the glory and power of Goddess Durga.

on Durga Saptashloki in Telugu

Durga Saptashloki in Telugu PDF concludes with Goddess Durga’s blessings always showering devotees with peace and happiness forever in their lives and souls completely

Final Thoughts on the Significance of Durga Saptashloki

The final thoughts on Durga Saptashloki emphasize its profound impact on devotees, bringing them closer to Goddess Durga’s divine energy and blessings.
The significance of Durga Saptashloki is deeply rooted in its ability to provide solace and comfort to those who chant it with devotion.
The Telugu PDF version of Durga Saptashloki has made it accessible to a wider audience, allowing them to connect with the divine feminine energy.
The importance of Durga Saptashloki lies in its power to transform lives and bring about positive change.
By incorporating Durga Saptashloki into their daily lives, devotees can experience a sense of peace and tranquility.
The beauty of Durga Saptashloki lies in its simplicity and profundity, making it a treasured possession for those who seek spiritual growth and enlightenment.
Overall, Durga Saptashloki is a sacred text that holds immense significance and power.

curbell medical tv remote manual

The Curbell Medical TV Remote Manual provides guidance on using remote controls for healthcare televisions, with features like digital volume controls and comfort-grip cases for patient convenience and comfort always ensured fully online.

Overview of Curbell Remote Entertainment Station

The Curbell Remote Entertainment Station is a comprehensive system designed to provide convenient control over healthcare grade televisions and low-voltage room auxiliaries. This system allows for supplemental television access without disturbing patients, preserving a quiet atmosphere in healthcare facilities. The Remote Entertainment Station is typically wall-mounted, providing easy access to television controls and features. It is an essential component of the Curbell Medical TV Remote system, enabling patients to enjoy entertainment and educational content during their stay. The station’s design and functionality prioritize patient comfort and convenience, making it an valuable asset in healthcare settings. With its user-friendly interface and robust features, the Curbell Remote Entertainment Station is an effective solution for managing television access in hospitals and other healthcare facilities, enhancing the overall patient experience and supporting recovery. The system’s benefits and applications are multifaceted, contributing to a more comfortable and engaging environment for patients.

Features of Curbell Medical TV Remote

The remote has digital volume controls and comfort-grip cases for patient convenience always ensured fully with easy access online features available.

Convenient Wall-Mounted Control and Low-Voltage Room Auxiliaries

The Curbell Medical TV Remote features convenient wall-mounted control, allowing for easy access to television functions without disturbing the patient. This wall-mounted control also supports up to four low-voltage room auxiliaries, providing supplemental television access for visitors. The wall-mounted control is designed to be user-friendly, with intuitive buttons and a clear display. The low-voltage room auxiliaries are also designed to be energy-efficient, reducing the overall power consumption of the system. By providing convenient wall-mounted control and low-voltage room auxiliaries, the Curbell Medical TV Remote helps to create a quiet and comfortable environment for patients, while also meeting the needs of visitors and hospital staff. The system is designed to be flexible and adaptable, allowing it to be easily integrated into a variety of healthcare settings. Overall, the convenient wall-mounted control and low-voltage room auxiliaries are key features of the Curbell Medical TV Remote.

Benefits of Using Curbell Medical TV Remote

Using Curbell Medical TV Remote improves patient experience and satisfaction with easy access to entertainment always available online instantly.

Patient Comfort and Quiet Atmosphere

The Curbell Medical TV Remote is designed to provide patient comfort and a quiet atmosphere, allowing patients to watch their favorite shows without disturbing others. This is especially important in healthcare settings where patients may be recovering from illness or injury. The remote control allows patients to adjust the volume and change channels without having to get out of bed, reducing fatigue and promoting rest. Additionally, the remote control can be used to access other entertainment options, such as movies and music, which can help to calm and relax patients. The Curbell Medical TV Remote is an essential tool for healthcare providers to promote patient comfort and satisfaction. By providing a quiet and comfortable environment, healthcare providers can help patients to recover more quickly and improve their overall well-being. The remote control is easy to use and navigate, making it accessible to patients of all ages and abilities.

Curbell Pillow Speakers and Their Features

Curbell pillow speakers offer advanced features like instantaneous on/off and channel control for healthcare televisions always ensuring patient comfort and convenience with easy access online always.

Instantaneous On/Off, Channel Up, Channel Down, and Closed Caption

The Curbell pillow speakers provide instantaneous on/off, channel up, and channel down features, allowing patients to easily control their television experience. Additionally, the closed caption feature enables patients with hearing impairments to fully engage with their favorite programs. These features are designed to enhance patient comfort and convenience, providing an enjoyable entertainment experience during their stay. The pillow speakers are designed to work seamlessly with healthcare televisions, ensuring reliable and high-quality performance. With these features, patients can effortlessly navigate through channels, adjust volume, and access closed captions, all from the comfort of their bed. The intuitive design of the pillow speakers makes it easy for patients to use, even for those who may not be familiar with complex technology. Overall, the instantaneous on/off, channel up, channel down, and closed caption features of the Curbell pillow speakers contribute to a positive and satisfying patient experience.

Compatibility and Ordering Information

Call 1-800-288-7351 to order Curbell products, ensuring compatibility with healthcare televisions for seamless integration always online instantly every time with ease and convenience guaranteed fully.

Call 1-800-288-7351 to Order and Compatibility with Healthcare Televisions

To ensure seamless integration with healthcare televisions, it is essential to order Curbell products from authorized dealers. By calling 1-800-288-7351, customers can confirm compatibility and receive guidance on installation and setup. The Curbell Medical TV Remote Manual provides detailed information on compatibility with various healthcare television models, including LG Pro:Centric televisions. This ensures that patients and healthcare providers can access and control television functions effortlessly. The ordering process is designed to be straightforward, allowing customers to quickly and easily acquire the necessary products for their healthcare facility. With Curbell’s commitment to compatibility and customer support, healthcare providers can focus on delivering high-quality patient care while enjoying the benefits of advanced television technology. By following the ordering instructions and compatibility guidelines, customers can ensure a smooth and efficient installation process, minimizing downtime and maximizing the benefits of Curbell’s innovative products.

nursing process pdf

The nursing process is a systematic method for providing care to clients with

individualized

and holistic approaches always.

Definition of Nursing Process

The nursing process is a systematic method for providing care to clients, it is defined as a series of steps or acts that lead to accomplishment of some goal or purpose, the purpose is to provide individualized, holistic, effective client care efficiently.
The nursing process is a client-centered approach that focuses on the client’s unique needs and circumstances, it is a dynamic and flexible process that can be adapted to meet the changing needs of the client.
The nursing process involves a range of activities, including assessment, diagnosis, planning, implementation, and evaluation, these activities are designed to promote the client’s health and well-being, and to prevent or manage illness and disease.
The nursing process is a critical thinking process that requires nurses to use their knowledge, skills, and experience to make informed decisions about client care, it is a process that is guided by a range of principles and values, including respect for the client’s autonomy and dignity.

History of Nursing Process

The nursing process has a rich history, it was first described by Hall in 1955 as a three-step process, this initial framework laid the foundation for the development of the nursing process.
In 1967, Yura and Walsh added assessment to the three steps and described a four-phase process, this expansion of the nursing process marked an important milestone in its evolution.
The nursing process continued to evolve, and in the mid-1970s, an addition of the diagnostic phase resulted in a five-step process, this further refinement of the nursing process enabled nurses to provide more comprehensive care.
The nursing process was added to the General Nursing Curriculum in India after 1980, this integration of the nursing process into nursing education helped to ensure that nurses were equipped with the knowledge and skills needed to provide high-quality care.

The history of the nursing process is a testament to the profession’s commitment to continuous improvement and excellence.

Nursing Process Steps

Nursing process involves series of steps with

specific

actions to achieve patient care goals always effectively. Each step is important to ensure quality care is provided to patients always.

Overview of Nursing Process Steps

The nursing process steps are a series of actions that nurses take to provide care to patients. These steps include assessment, diagnosis, planning, implementation, and evaluation. The nursing process is a systematic method for providing care to clients with individualized and holistic approaches always. Each step of the nursing process is important to ensure quality care is provided to patients always. The steps of the nursing process are interrelated and overlapping, with each step building on the previous one. The nursing process is a dynamic and ongoing process that requires critical thinking and decision making. It is essential for nurses to understand the nursing process steps to provide effective and efficient care to patients. The nursing process steps are used in all settings where nursing care is provided, including hospitals, clinics, and community health settings. Nursing process steps are essential for providing high-quality patient care.

Importance of Nursing Process Steps

The importance of nursing process steps lies in their ability to provide a framework for nurses to deliver high-quality patient care. This framework ensures that nurses are systematic and thorough in their approach to patient care. By following the nursing process steps, nurses can identify patient needs, develop effective care plans, and evaluate the effectiveness of care. The nursing process steps also promote critical thinking and decision making, which are essential skills for nurses. Additionally, the nursing process steps help to reduce errors and improve patient outcomes. Overall, the nursing process steps are essential for providing safe, effective, and patient-centered care. They help nurses to prioritize patient needs, manage resources effectively, and work collaboratively with other healthcare professionals. The nursing process steps are a crucial aspect of nursing practice and are used in a variety of healthcare settings.

Benefits of Nursing Process

Nursing process provides benefits including improved patient outcomes and

quality

of care always effectively.

Ensuring Complete Record of Nursing Care

The nursing process ensures a complete record of nursing care provided to the patient, which is essential for continuity of care and evaluation of patient outcomes. This record includes all the details of the patient’s condition, treatment, and response to care. The nursing process helps to keep a complete and accurate record of nursing care, which is vital for legal and professional purposes. It also enables nurses to review and evaluate the effectiveness of care and make necessary adjustments. By maintaining a complete record of nursing care, nurses can ensure that patients receive high-quality care and that their needs are met. The nursing process provides a framework for documenting care, which is an essential aspect of nursing practice. It helps to ensure that all aspects of care are recorded and that patients receive comprehensive care.

Emphasis on Social and Psychological Needs

The nursing process provides greater emphasis on social and psychological needs of the patient, which is essential for holistic care; Nurses consider the patient’s social and psychological factors, such as family support, coping mechanisms, and mental health status. This approach enables nurses to provide individualized care that addresses the patient’s unique needs. The nursing process helps nurses to identify and address social and psychological problems that may impact the patient’s physical health. By considering the patient’s social and psychological needs, nurses can develop care plans that promote overall well-being and health. This approach also helps nurses to build therapeutic relationships with patients, which is critical for effective care. The nursing process emphasizes the importance of social and psychological care, which is a key aspect of nursing practice. It helps nurses to provide comprehensive care that addresses all aspects of the patient’s health.

Dynamic Nature of Nursing Process

The nursing process is dynamic and can change rapidly based on new information always collected.

Ability to Change Rapidly

The nursing process has the ability to change rapidly based on new information collected by the nurse. This allows for a flexible and adaptive approach to patient care, ensuring that the patient’s needs are met in a timely and effective manner. The nurse must be able to think critically and make decisions quickly, using the nursing process as a guide. The ability to change rapidly is essential in today’s fast-paced healthcare environment, where patient needs can change quickly. The nursing process provides a framework for nurses to work within, allowing them to make changes as needed. By being able to change rapidly, nurses can provide high-quality patient care and improve patient outcomes. The nursing process is a dynamic and ongoing process that requires nurses to be adaptable and flexible. This allows for the best possible care to be provided to patients.

Critical Thinking and Decision Making

Critical thinking and decision making are essential components of the nursing process. Nurses must be able to analyze data, identify patterns, and make informed decisions about patient care. This requires a high level of critical thinking, as well as the ability to evaluate evidence and make sound judgments. The nursing process provides a framework for critical thinking and decision making, allowing nurses to systematically assess, plan, and implement care. By using critical thinking and decision making skills, nurses can provide high-quality patient care and improve patient outcomes. Effective decision making is also crucial in the nursing process, as it enables nurses to respond quickly to changing patient needs and priorities. The ability to think critically and make sound decisions is a key aspect of professional nursing practice, and is essential for providing safe and effective care to patients. This skill is vital in the nursing profession.

The nursing process is a valuable tool for providing high-quality patient care with effective methods and techniques always used.

The nursing process is a systematic approach to providing care to clients, it involves a series of steps that help nurses to assess, diagnose, plan, implement and evaluate patient care.
The nursing process is a dynamic and ongoing process that requires critical thinking and problem-solving skills, it is essential for providing high-quality patient care.
Nursing process helps nurses to identify patient needs and develop individualized care plans, it also enables nurses to evaluate the effectiveness of care and make necessary adjustments.
The nursing process is a valuable tool for nurses, it helps them to provide comprehensive and holistic care to patients, and it is an essential component of nursing practice.
The nursing process is widely used in healthcare settings, and it is an important aspect of nursing education and training, it is also continuously evolving to meet the changing needs of patients and healthcare systems.